The Wooden Spoon

Last week Bryan and I celebrated our three year wedding anniversary and it’s unbelievable how much has changed and how fast these three years went by. I love this man more and more each day and have truly enjoyed having him as my partner to tackle life’s lows and celebrate the highs. With that said, as I am sure the majority of couples can relate, it’s easy to get caught up in day to day routines. Often times we have to remind ourselves to step back from the responsibilities of running a home, graduate school, work e-mails, taking care of a dog, etc. and that before any of this, it was just him and I wanting to spend every moment together (still true..well..most of the time 😉 ). Because him and I usually have so much going on, date nights are sometimes a rare commodity. This is why I surprised him with a cooking class in the city to enjoy some wine + good food, celebrate these last three years, and possibly learn a thing or two along the way. 

While researching the dozens of places to partake in a cooking class in Chicago, one place in particular caught my eye. The Wooden Spoon had everything I was looking for – an intimate setting with a great menu, knowledgeable chefs, and was tucked inside of one of Chicago’s many interesting neighborhoods. It was a mere coincidence that once I had decided on this location for our class, they had a ‘Whiskey Grilling’ class scheduled for the week following our anniversary. I was sold. 

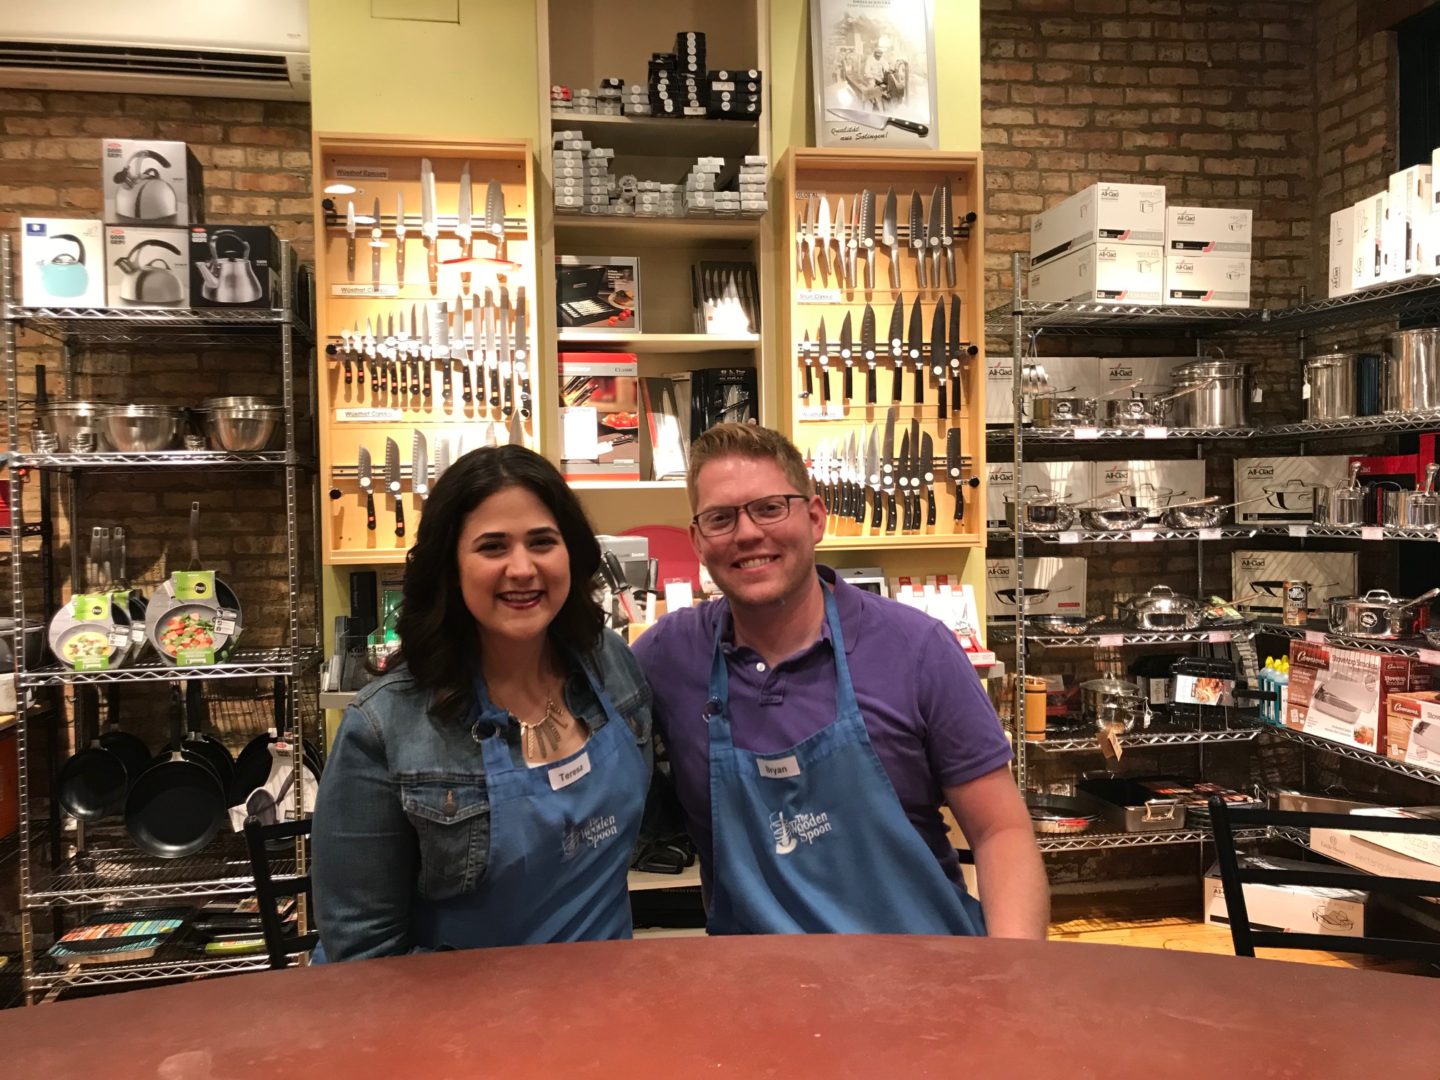
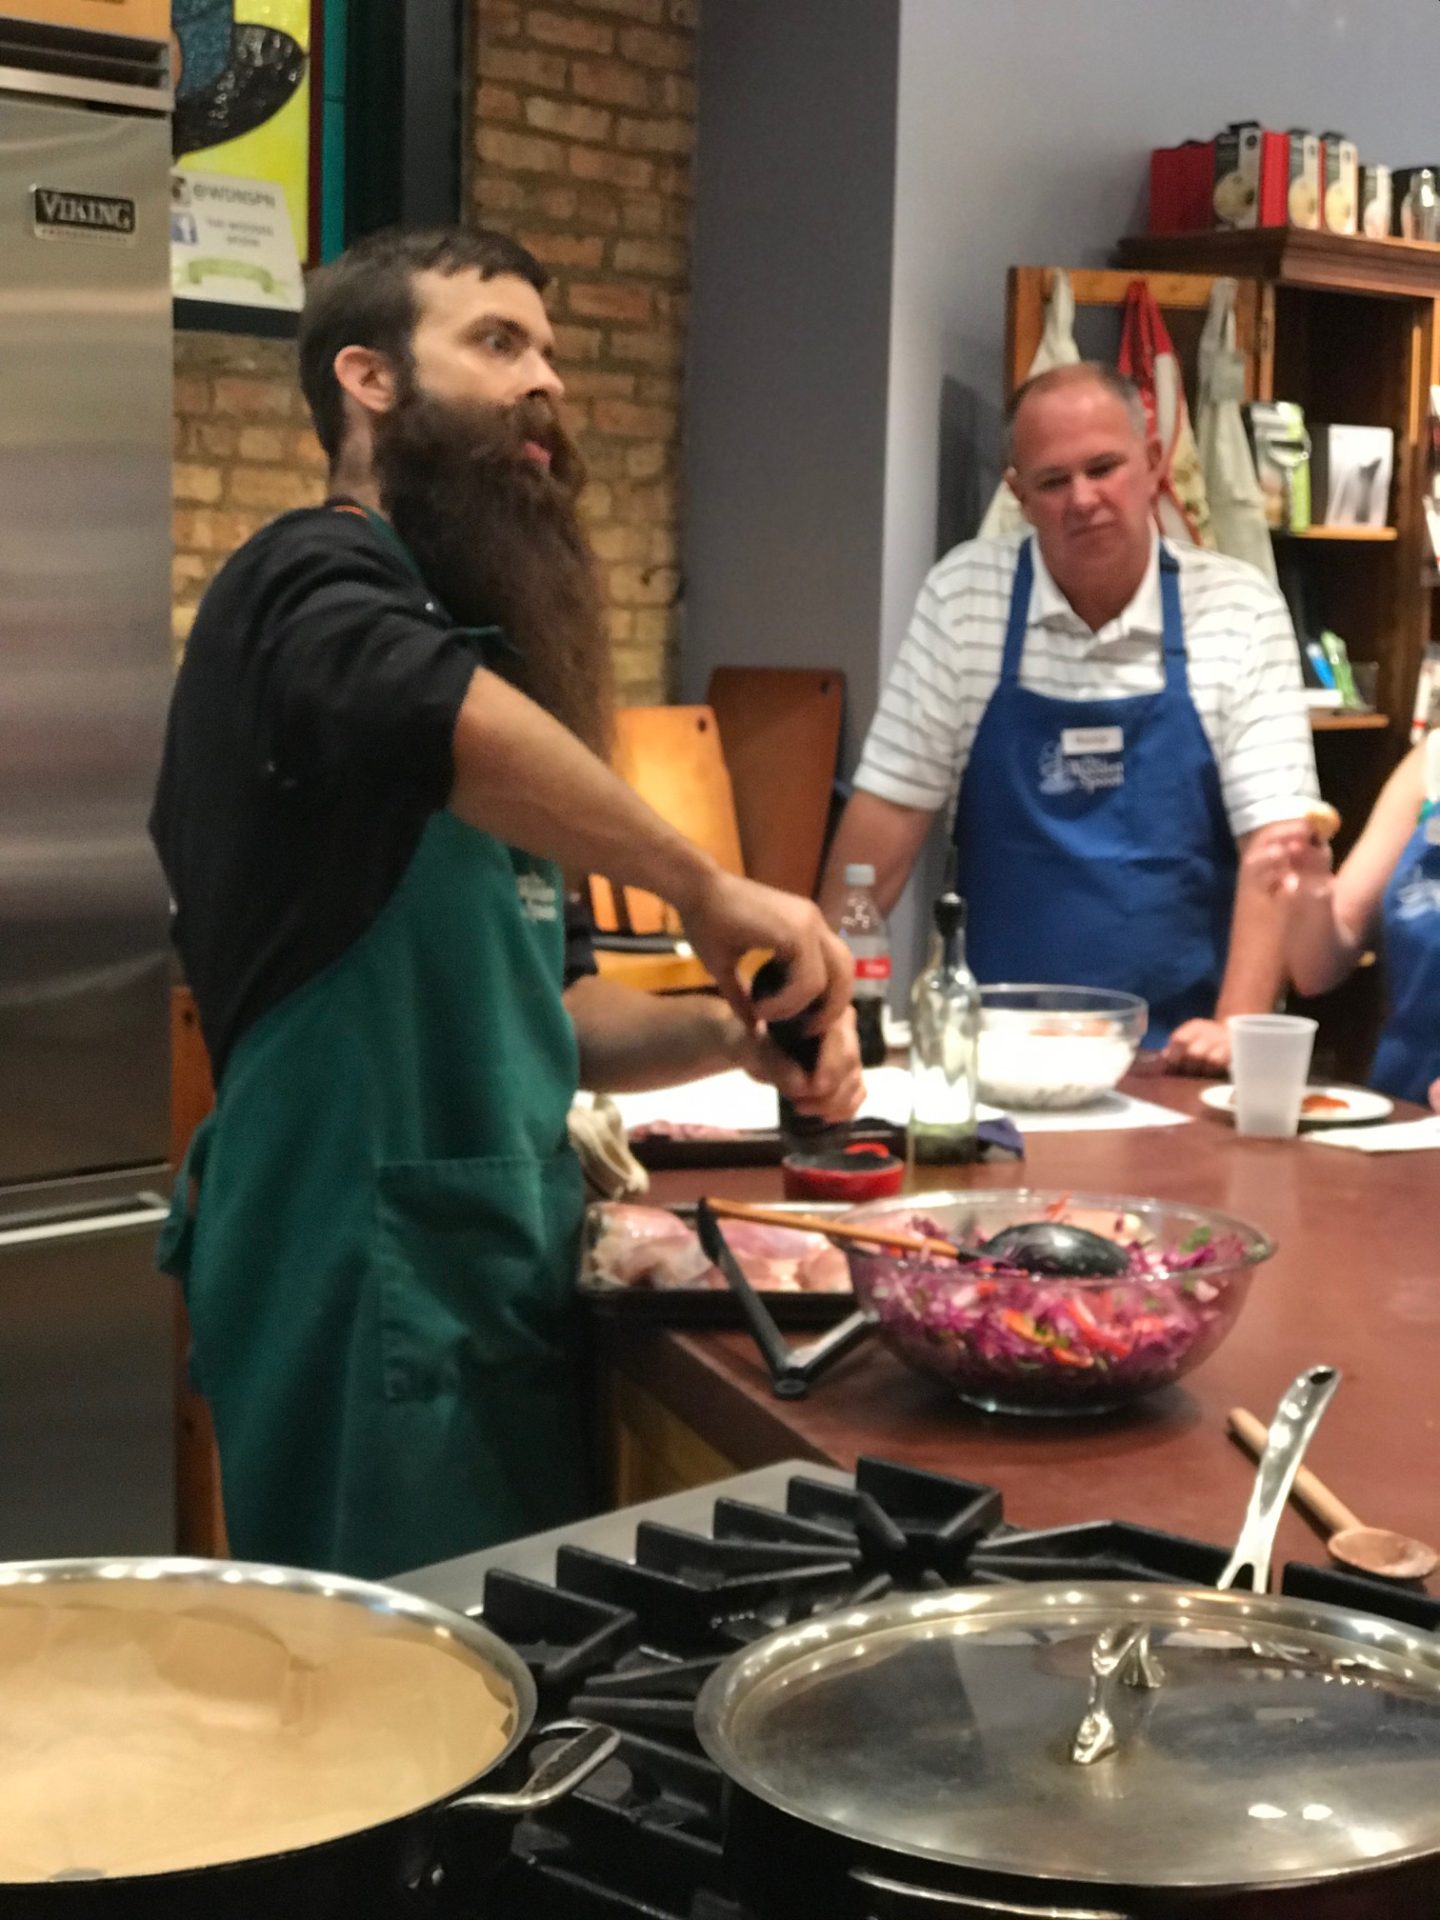
Let me start off by saying that this is one of those times I wish I could capture just how incredible of an experience we had in a blog post. I got a small taste of how kind and patient everyone is there after a small bout of panic while calling and telling them we would be 25 minutes late to our class due to a bad accident on Lake Shore Drive. Needless to say, we arrived a little bit flustered but were greeted by Chef Richard and four other wonderful couples with cheers, blue aprons labeled with our names, and wine opener to quickly get the Zinfandel flowing. 
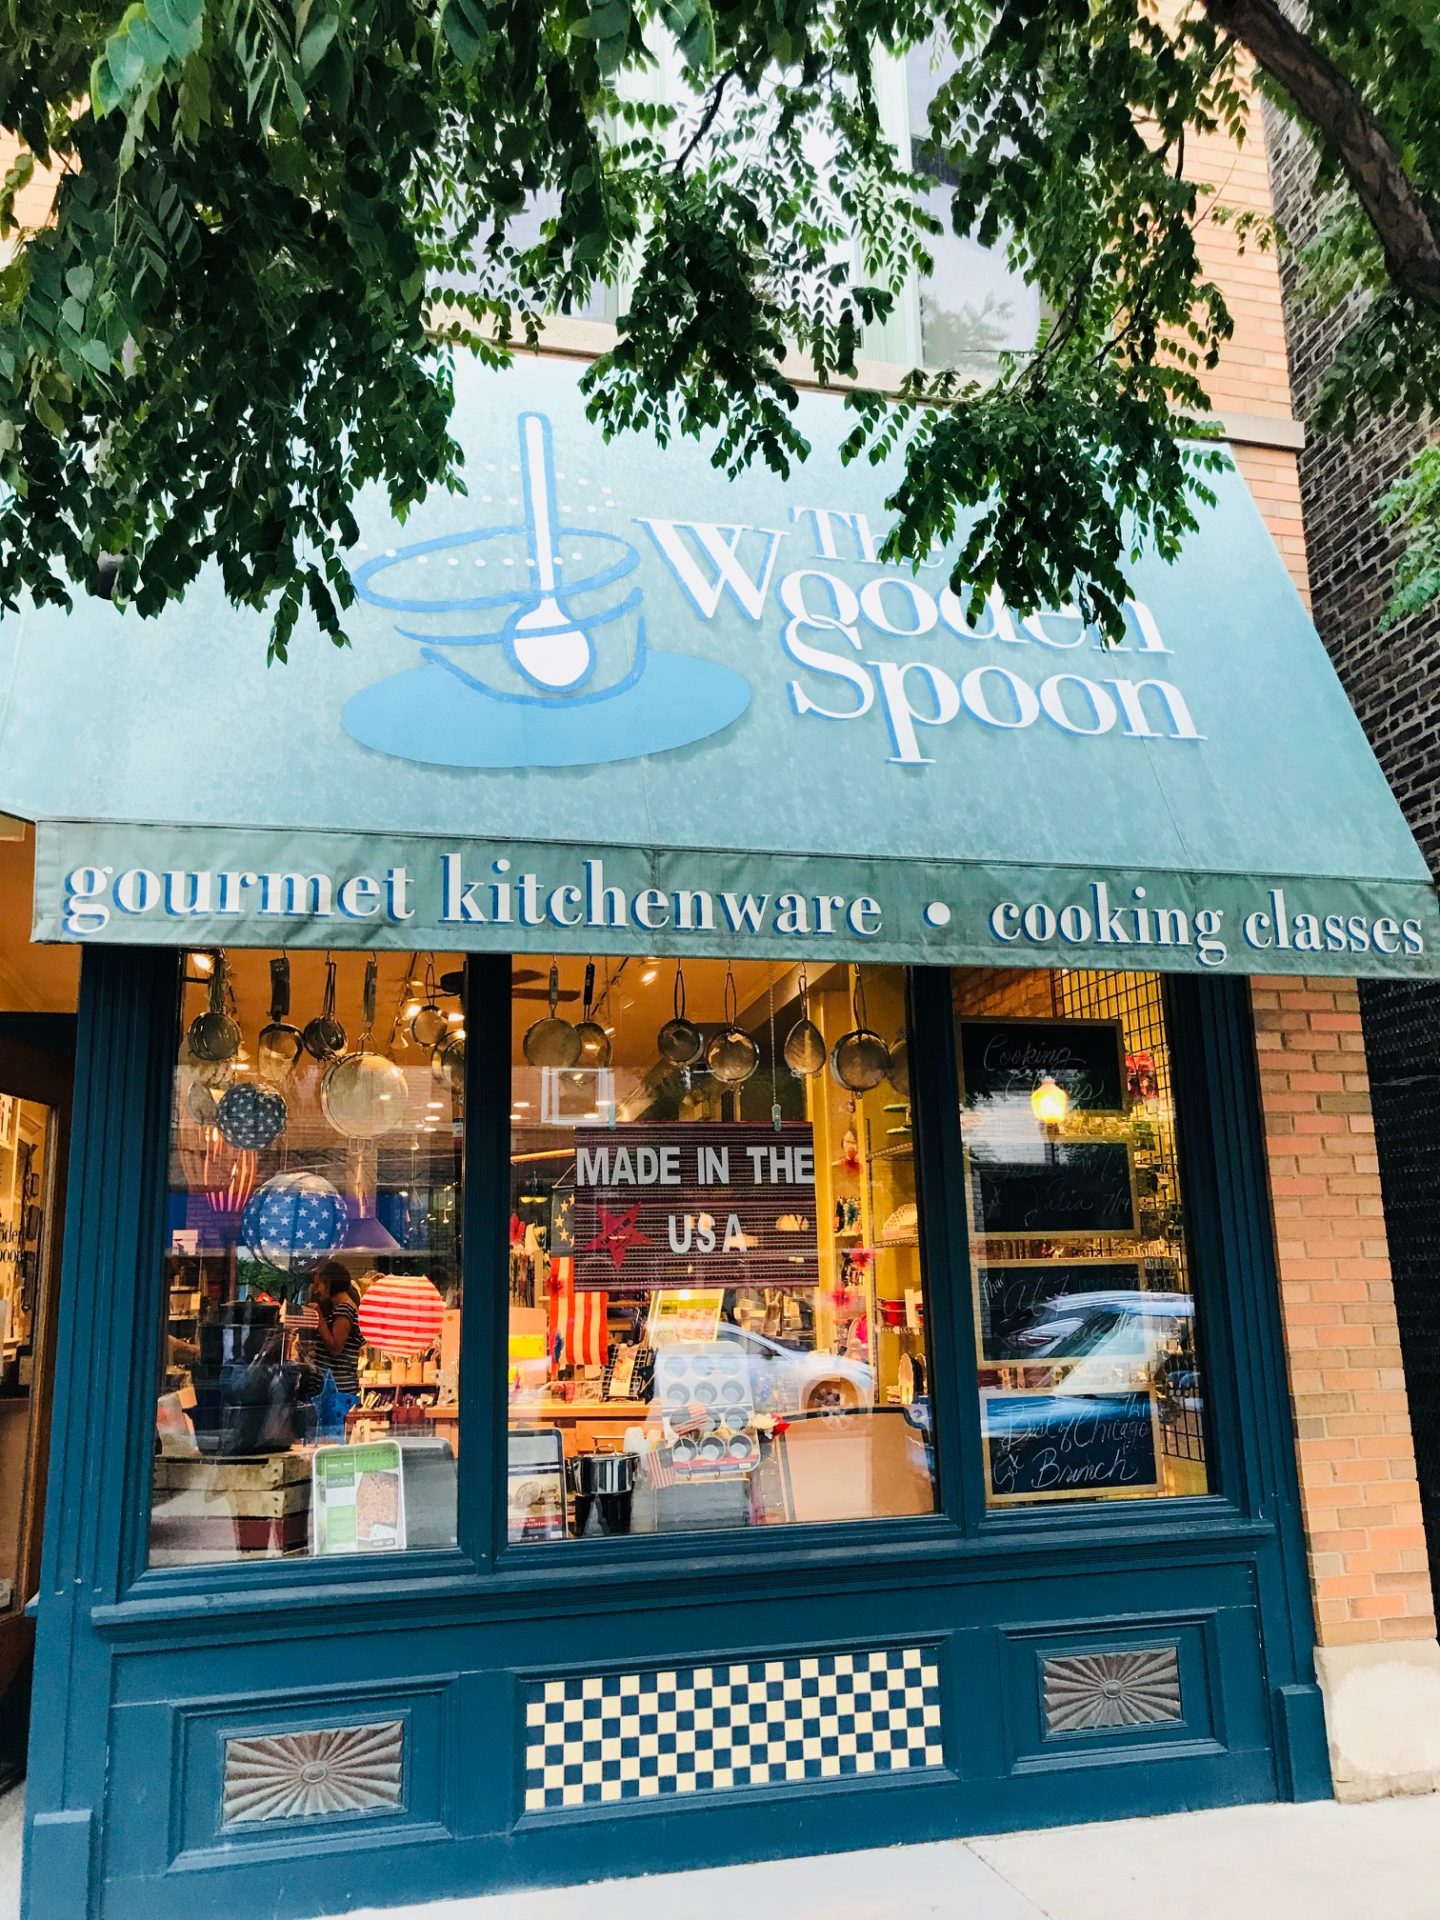
The Location

In order to convey how cool this place was, it’s definitely worth mentioning the neighborhood as well as the welcoming store front, store and kitchen set up, and beautiful outdoor grilling area. The Wooden Spoon is located in Chicago’s Andersonville neighborhood and is family owned and operated. Upon arrival you are greeted by an adorable store front complete with an actual giant wooden spoon, windows adorned with various kitchen gadgets, and chalkboards boasting the cooking classes scheduled for that day. It’s also important to mention that The Wooden Spoon is not just a cooking school but also a one stop shop for pretty much any kitchen tool or gadget you’re looking for. I had barely gotten my apron on and I had already made mental note of a few items I wanted to purchase after class. 

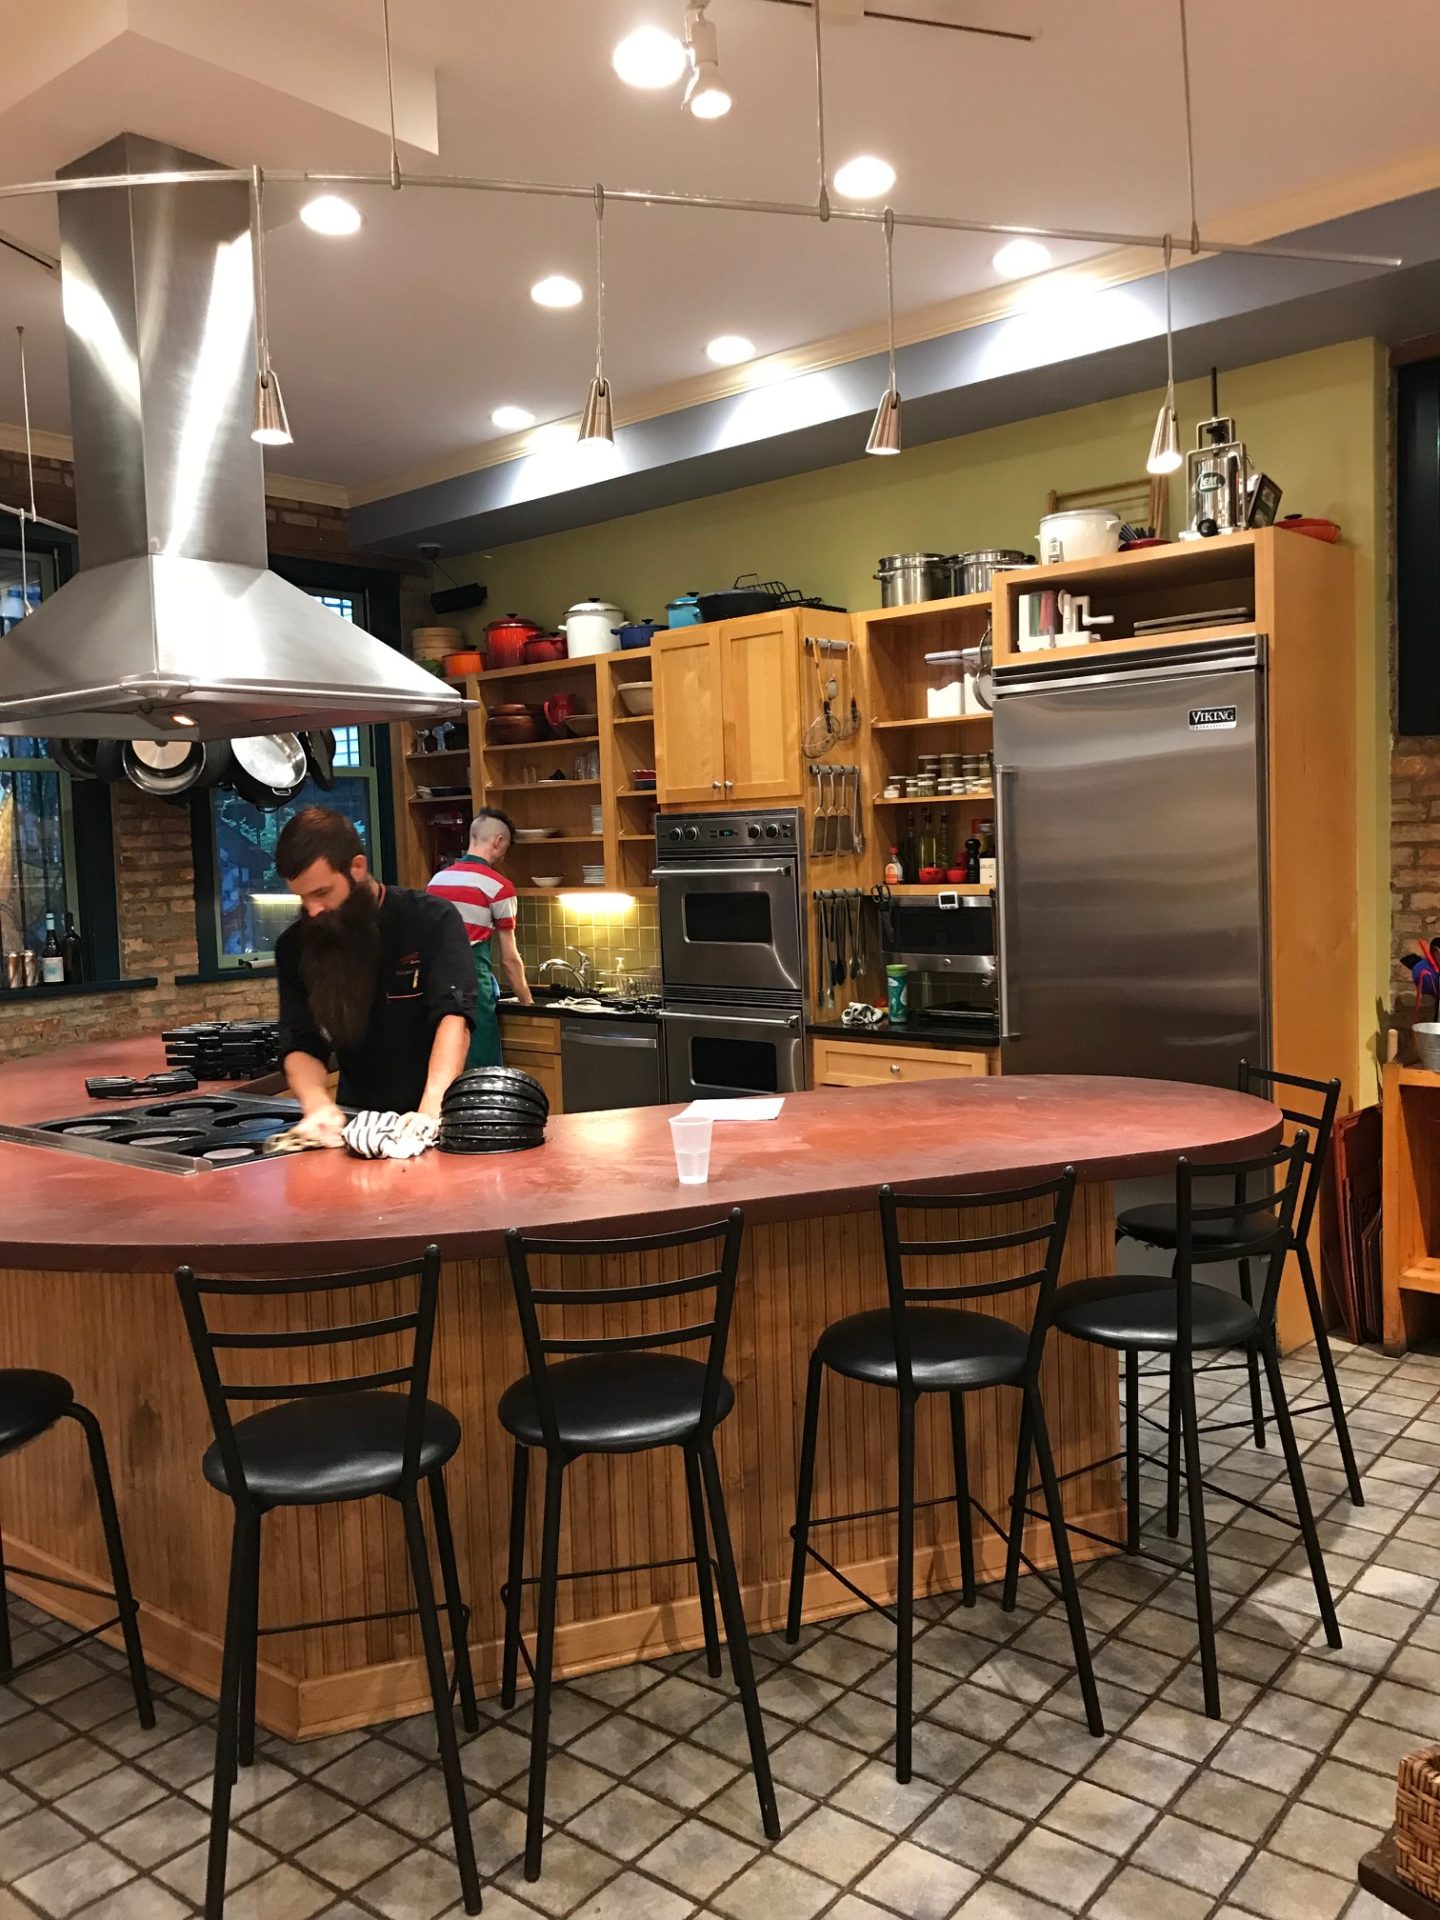
At the back of the store is the kitchen area out of even the most inexperienced of chef’s dreams. At the center of the prep and seating area is the equipment and enough open space to ensure that everyone feels included in the preparing/cooking of the meal and for the Chef of the evening to demonstrate and answer questions. 

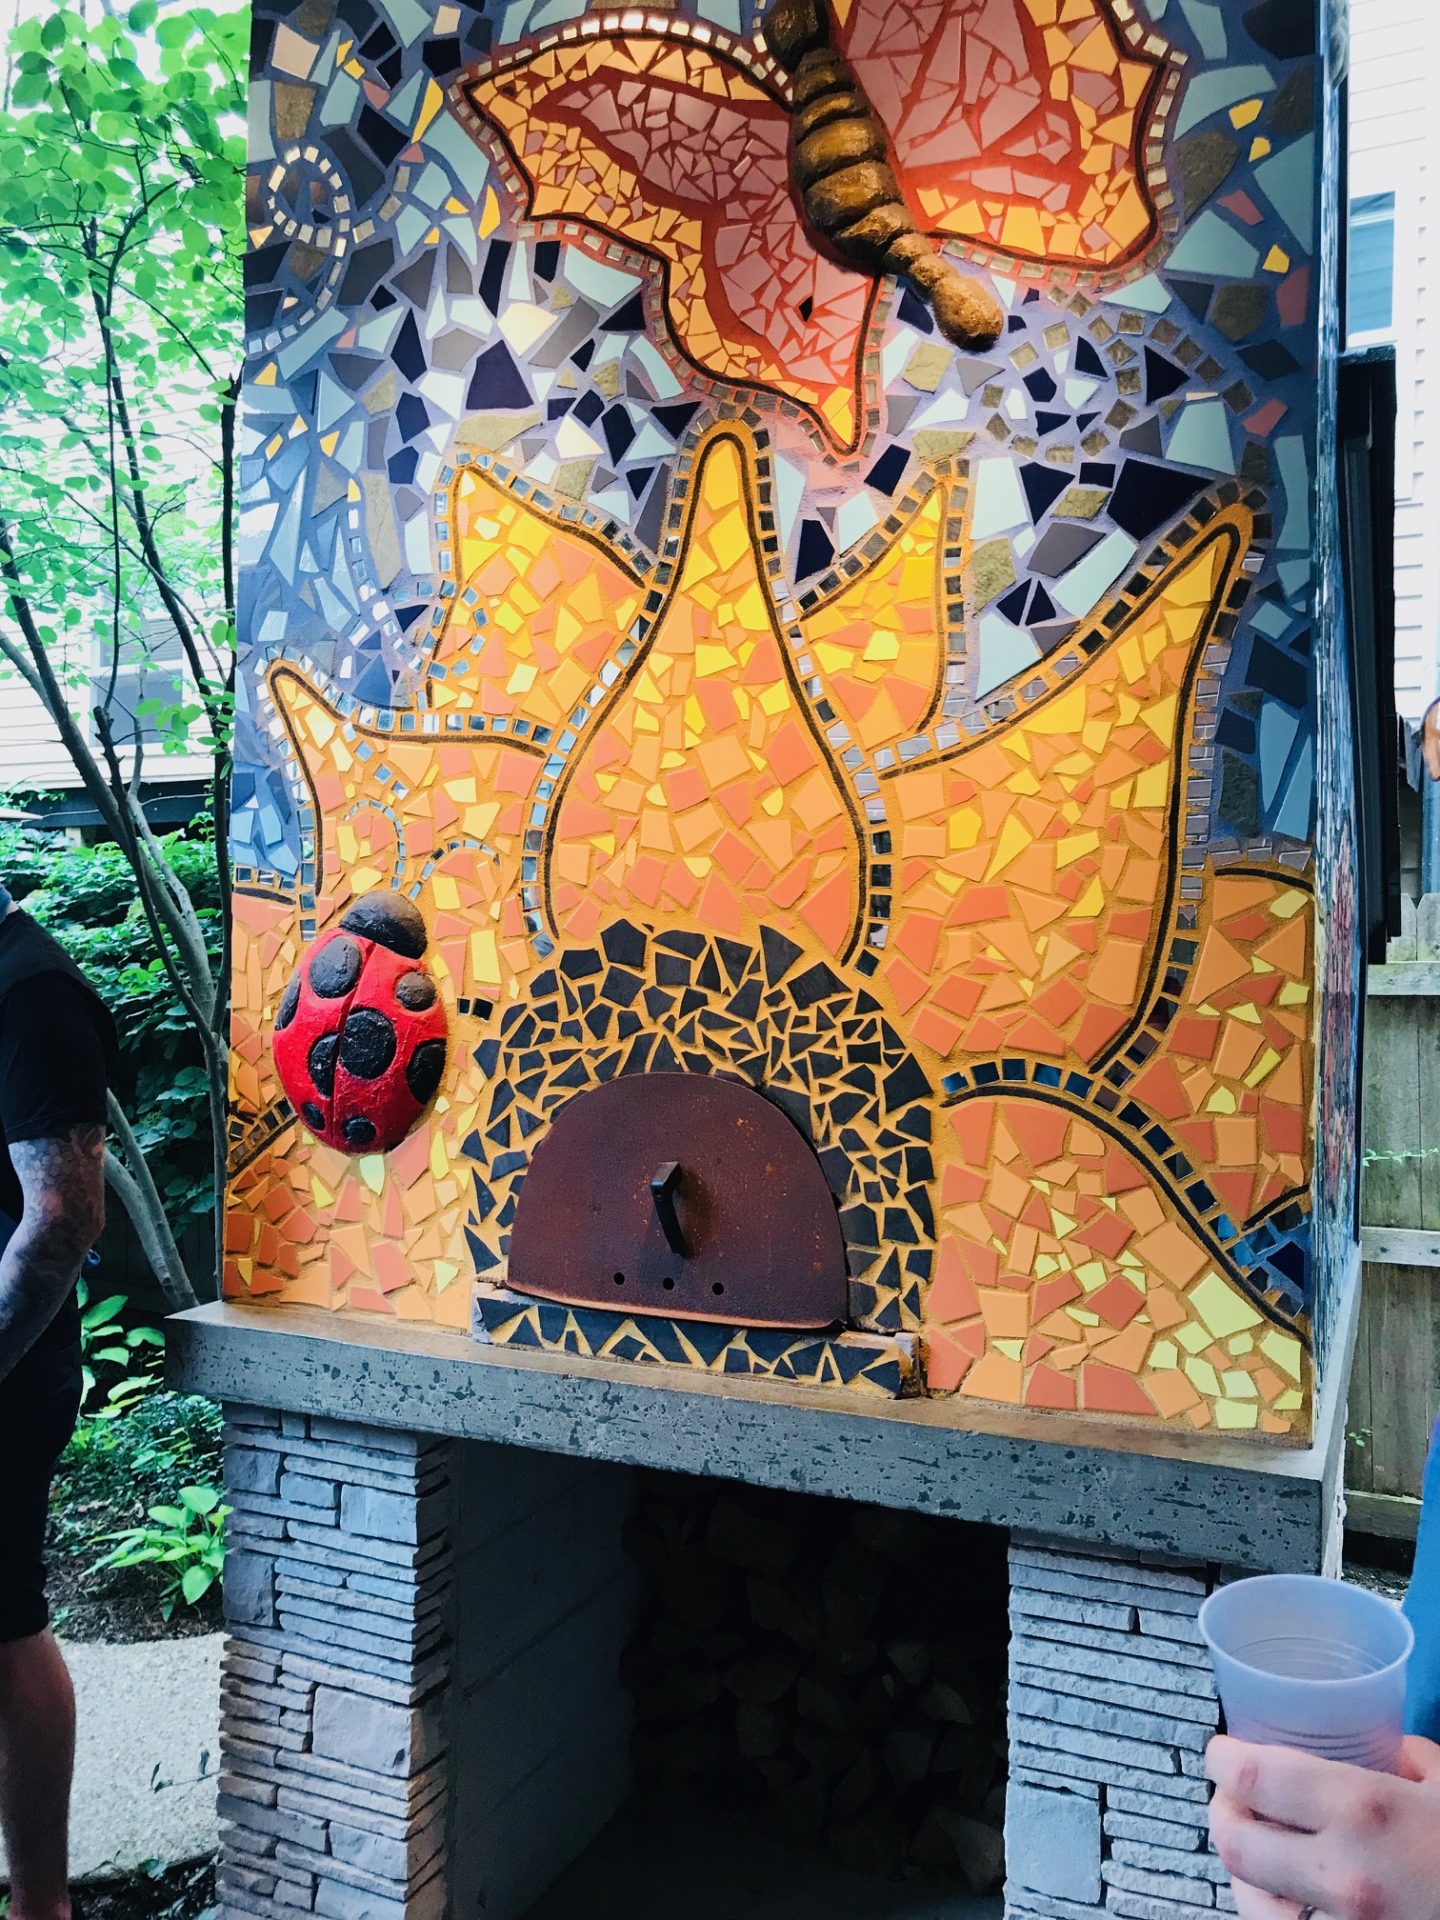
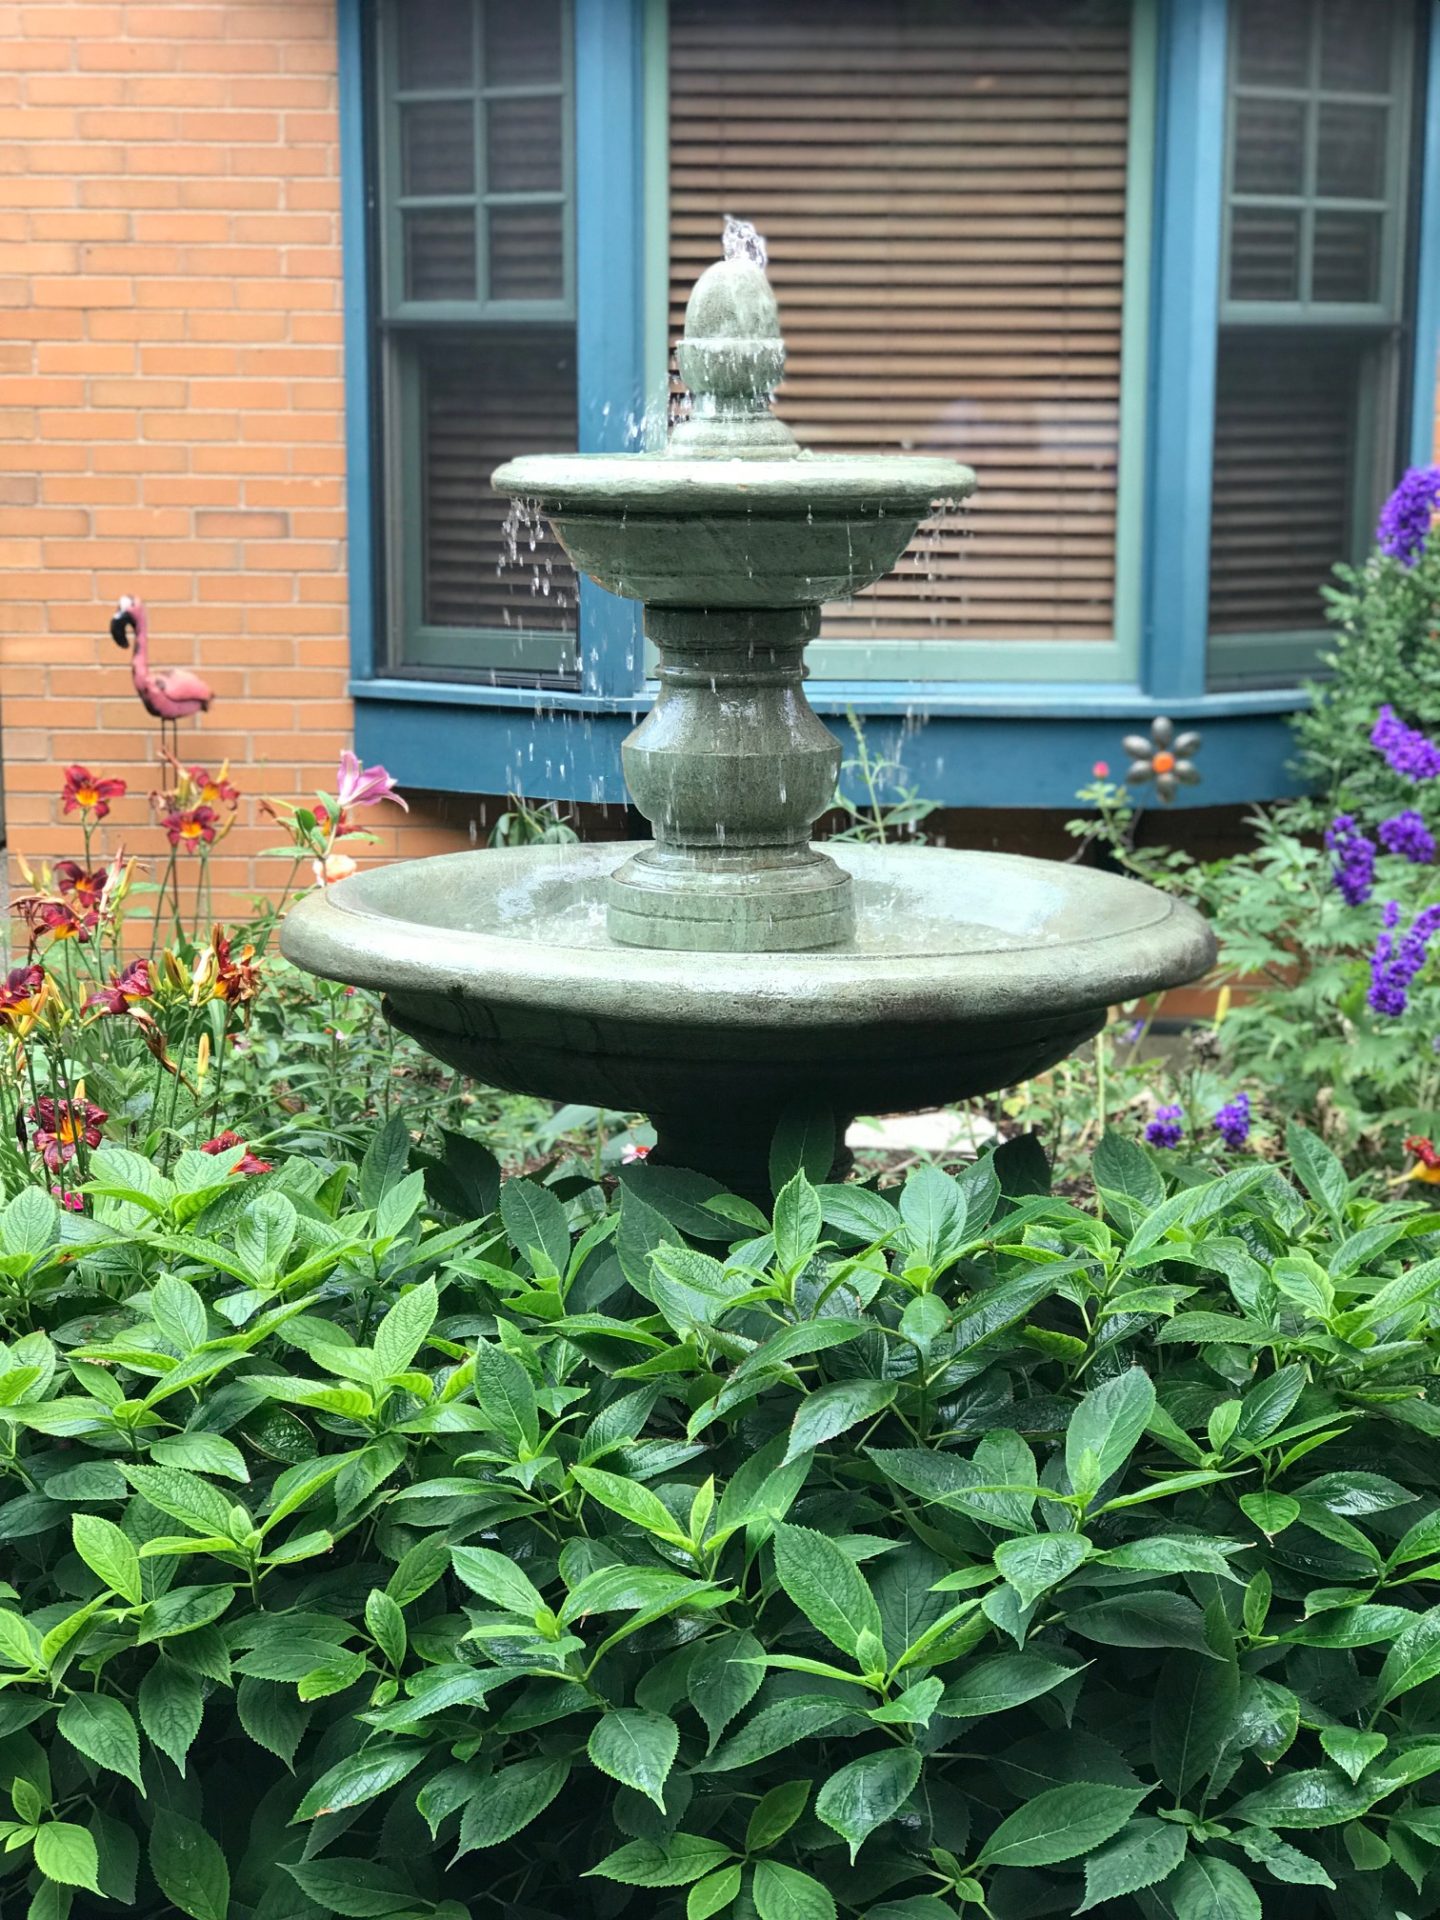
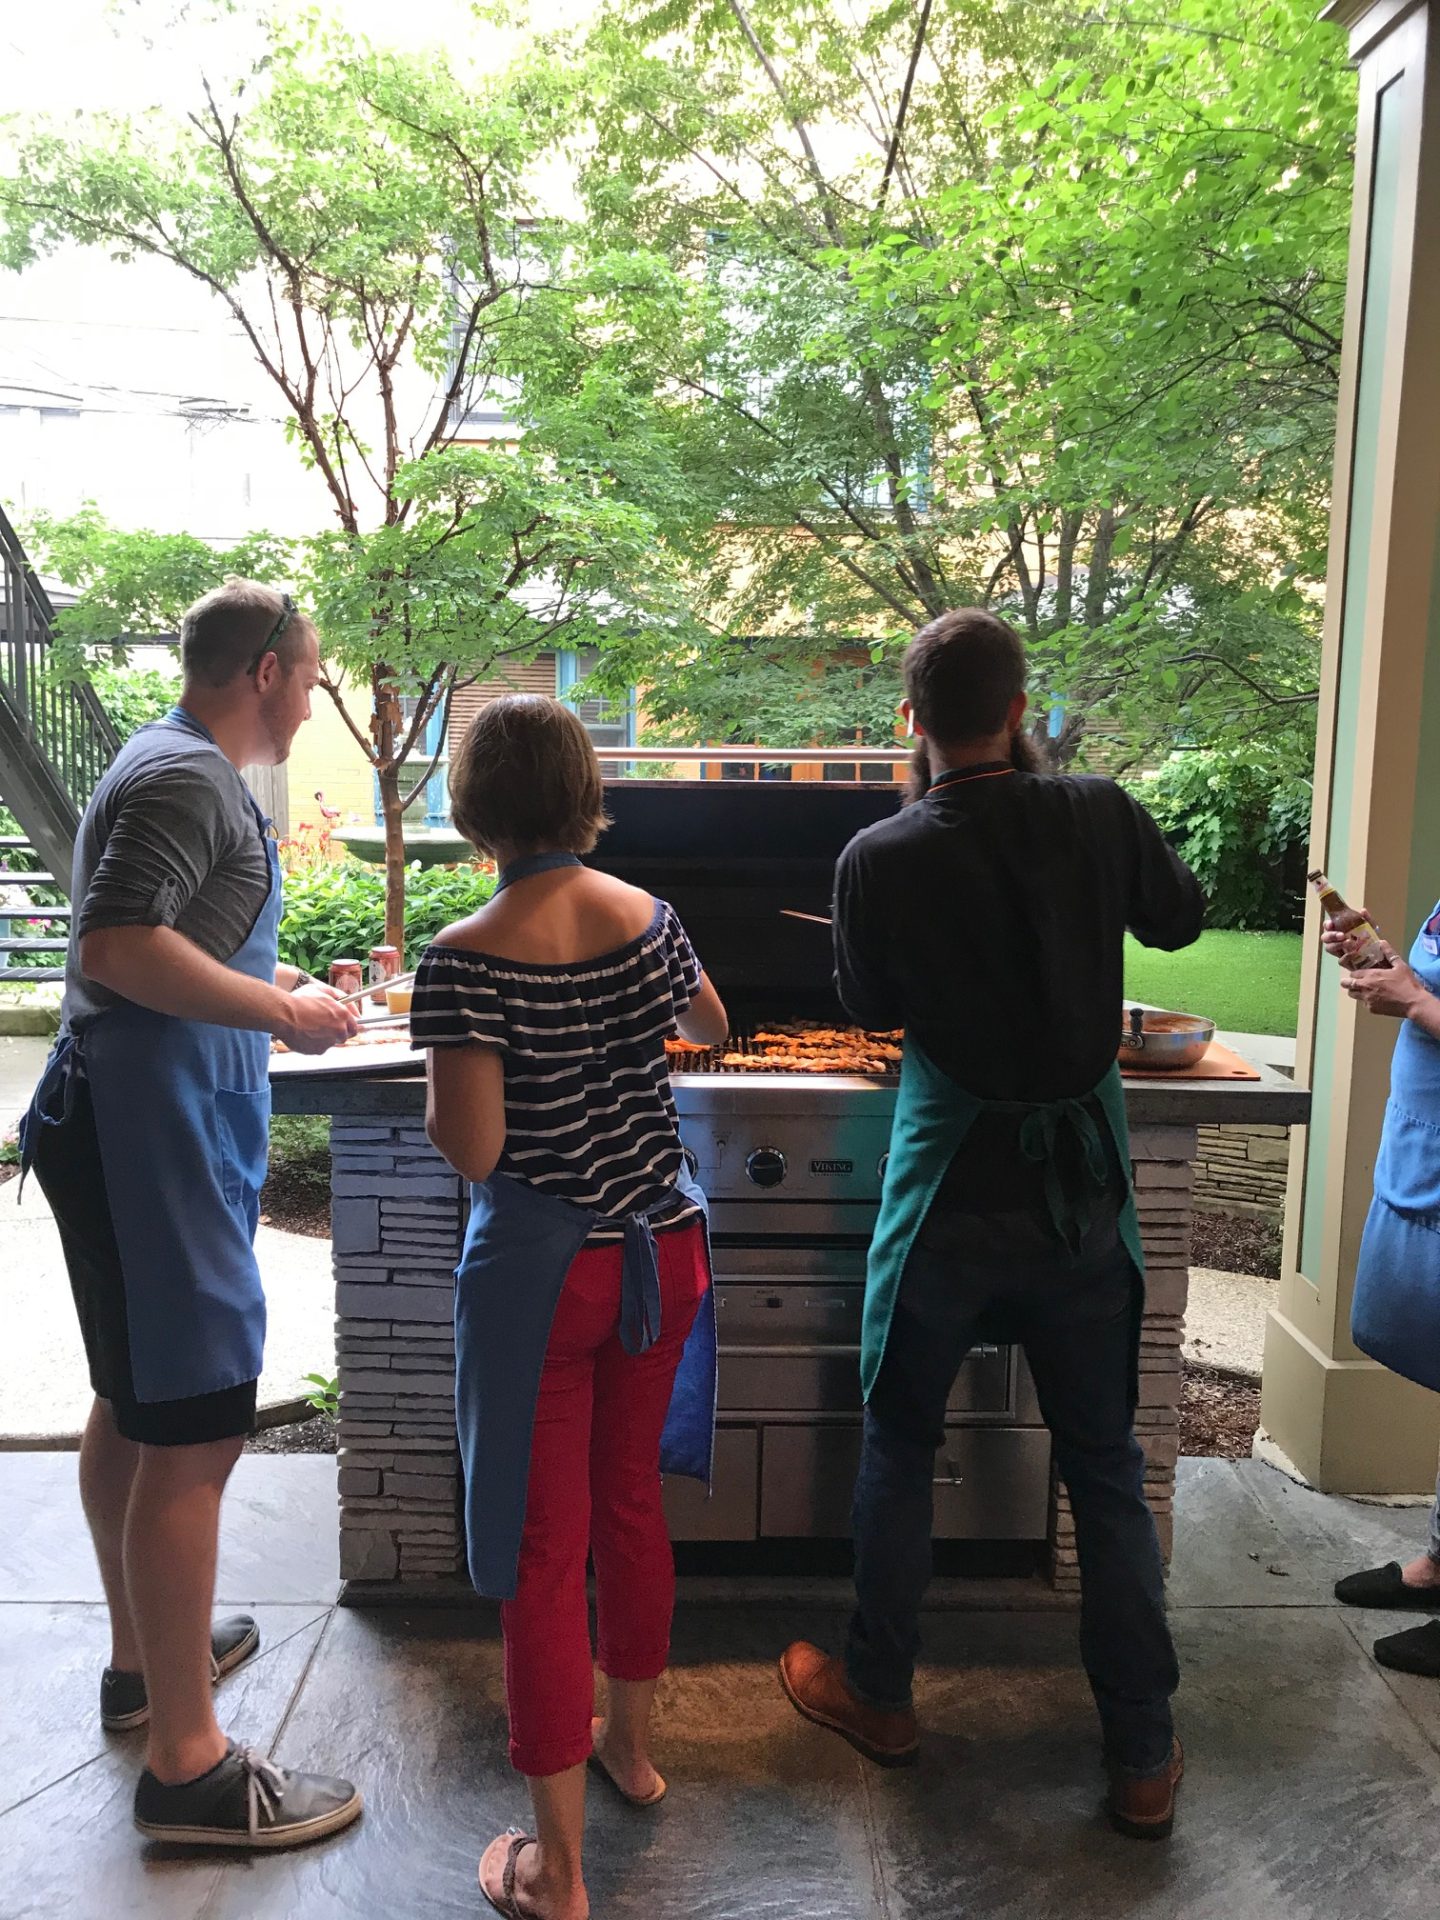
Just outside the back door of the kitchen is the patio and grill. I could have easily spent all evening on this patio staring at the colorful mosaic tiled pizza oven and charming fountain and garden area. We got incredibly lucky with perfect grilling weather for the evening and as a result, we were able to socialize with everyone inside and outside while we sipped on our wine and waited for the last few dishes to finish up. 


The Chef

Bryan and I both agreed that Chef Richard Ginn was probably one of the coolest people we have ever met. If I could describe the ideal person to walk us through how to cook with our favorite beverage – it would be him. Originally from South Carolina, Chef Richard is not only part of the team at The Wooden Spoon, but also has his own custom furniture design and construction company in Chicago called Riftsawn Woodworks. With such an interesting background, we really enjoyed learning from him and he creates an environment in which every couple feels relaxed and comfortable asking questions. 


The Menu

It would be ridiculous to not mention what we made but I left this for last because I sit here still dreaming about easily one of the best meals I have ever had (husband agrees too). The pictures I took on my phone don’t do any of this any sort of justice but I was desperate to capture each and every dish. 

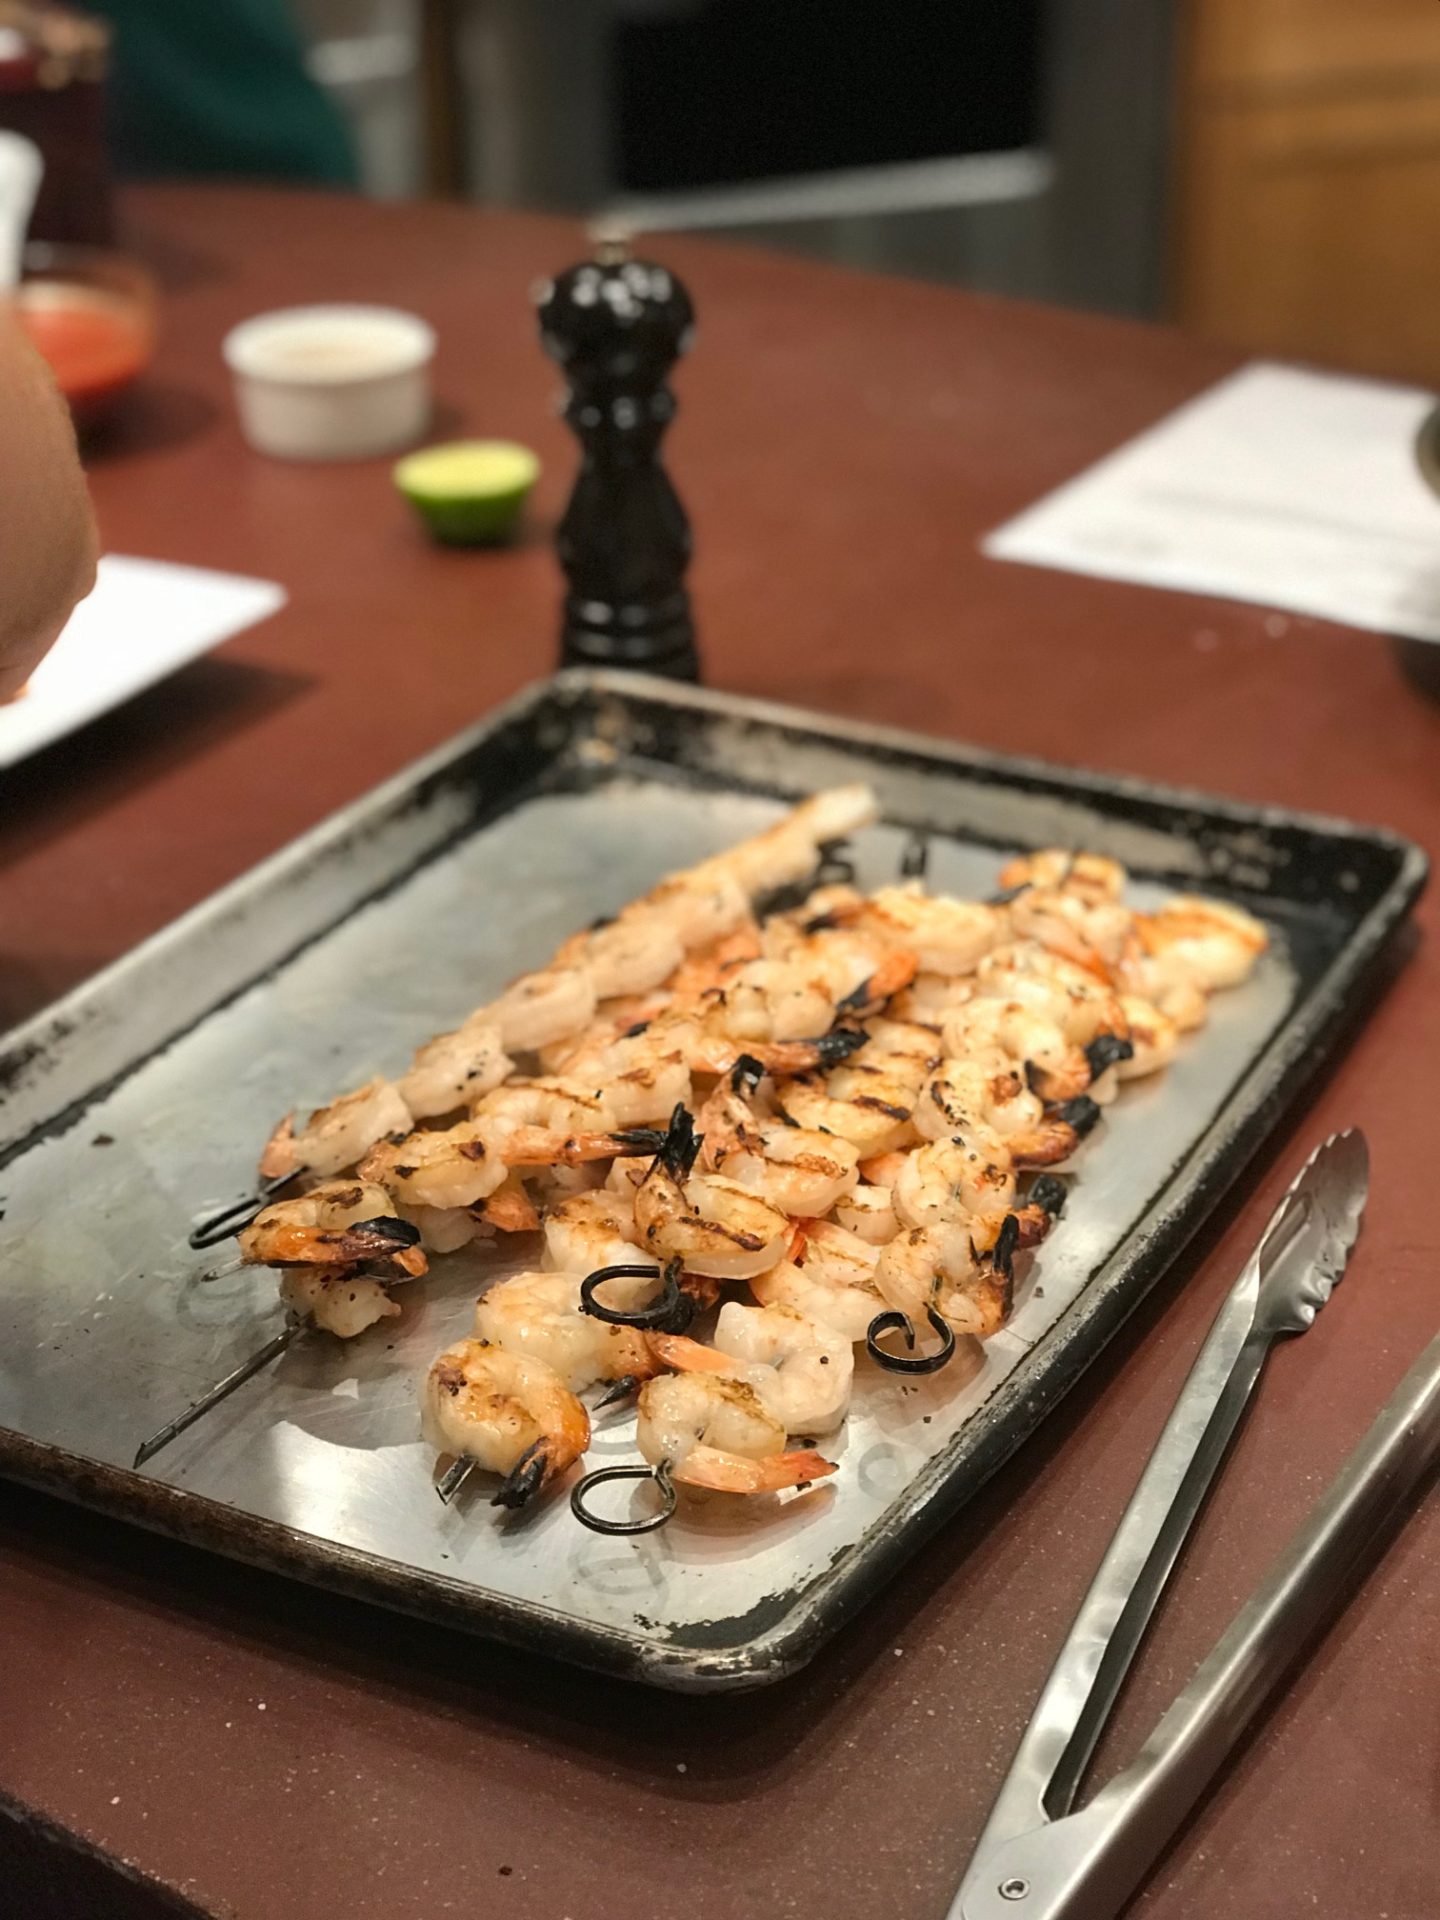
The couples began with preparing of all the sauces/glazes we would need, chopping vegetables, and combining the ingredients for the dessert. After the initial prep, the real nitty gritty of the meal began. First up was Grilled Shrimp with a Whiskey Cocktail Sauce. This looked delectable despite me not being able to take part (silly shellfish allergy). Luckily, Bryan took one for the team and ate both of our shrimp portions. Between bites, his only words were “holy crap”.  I’d call that a stamp of approval.

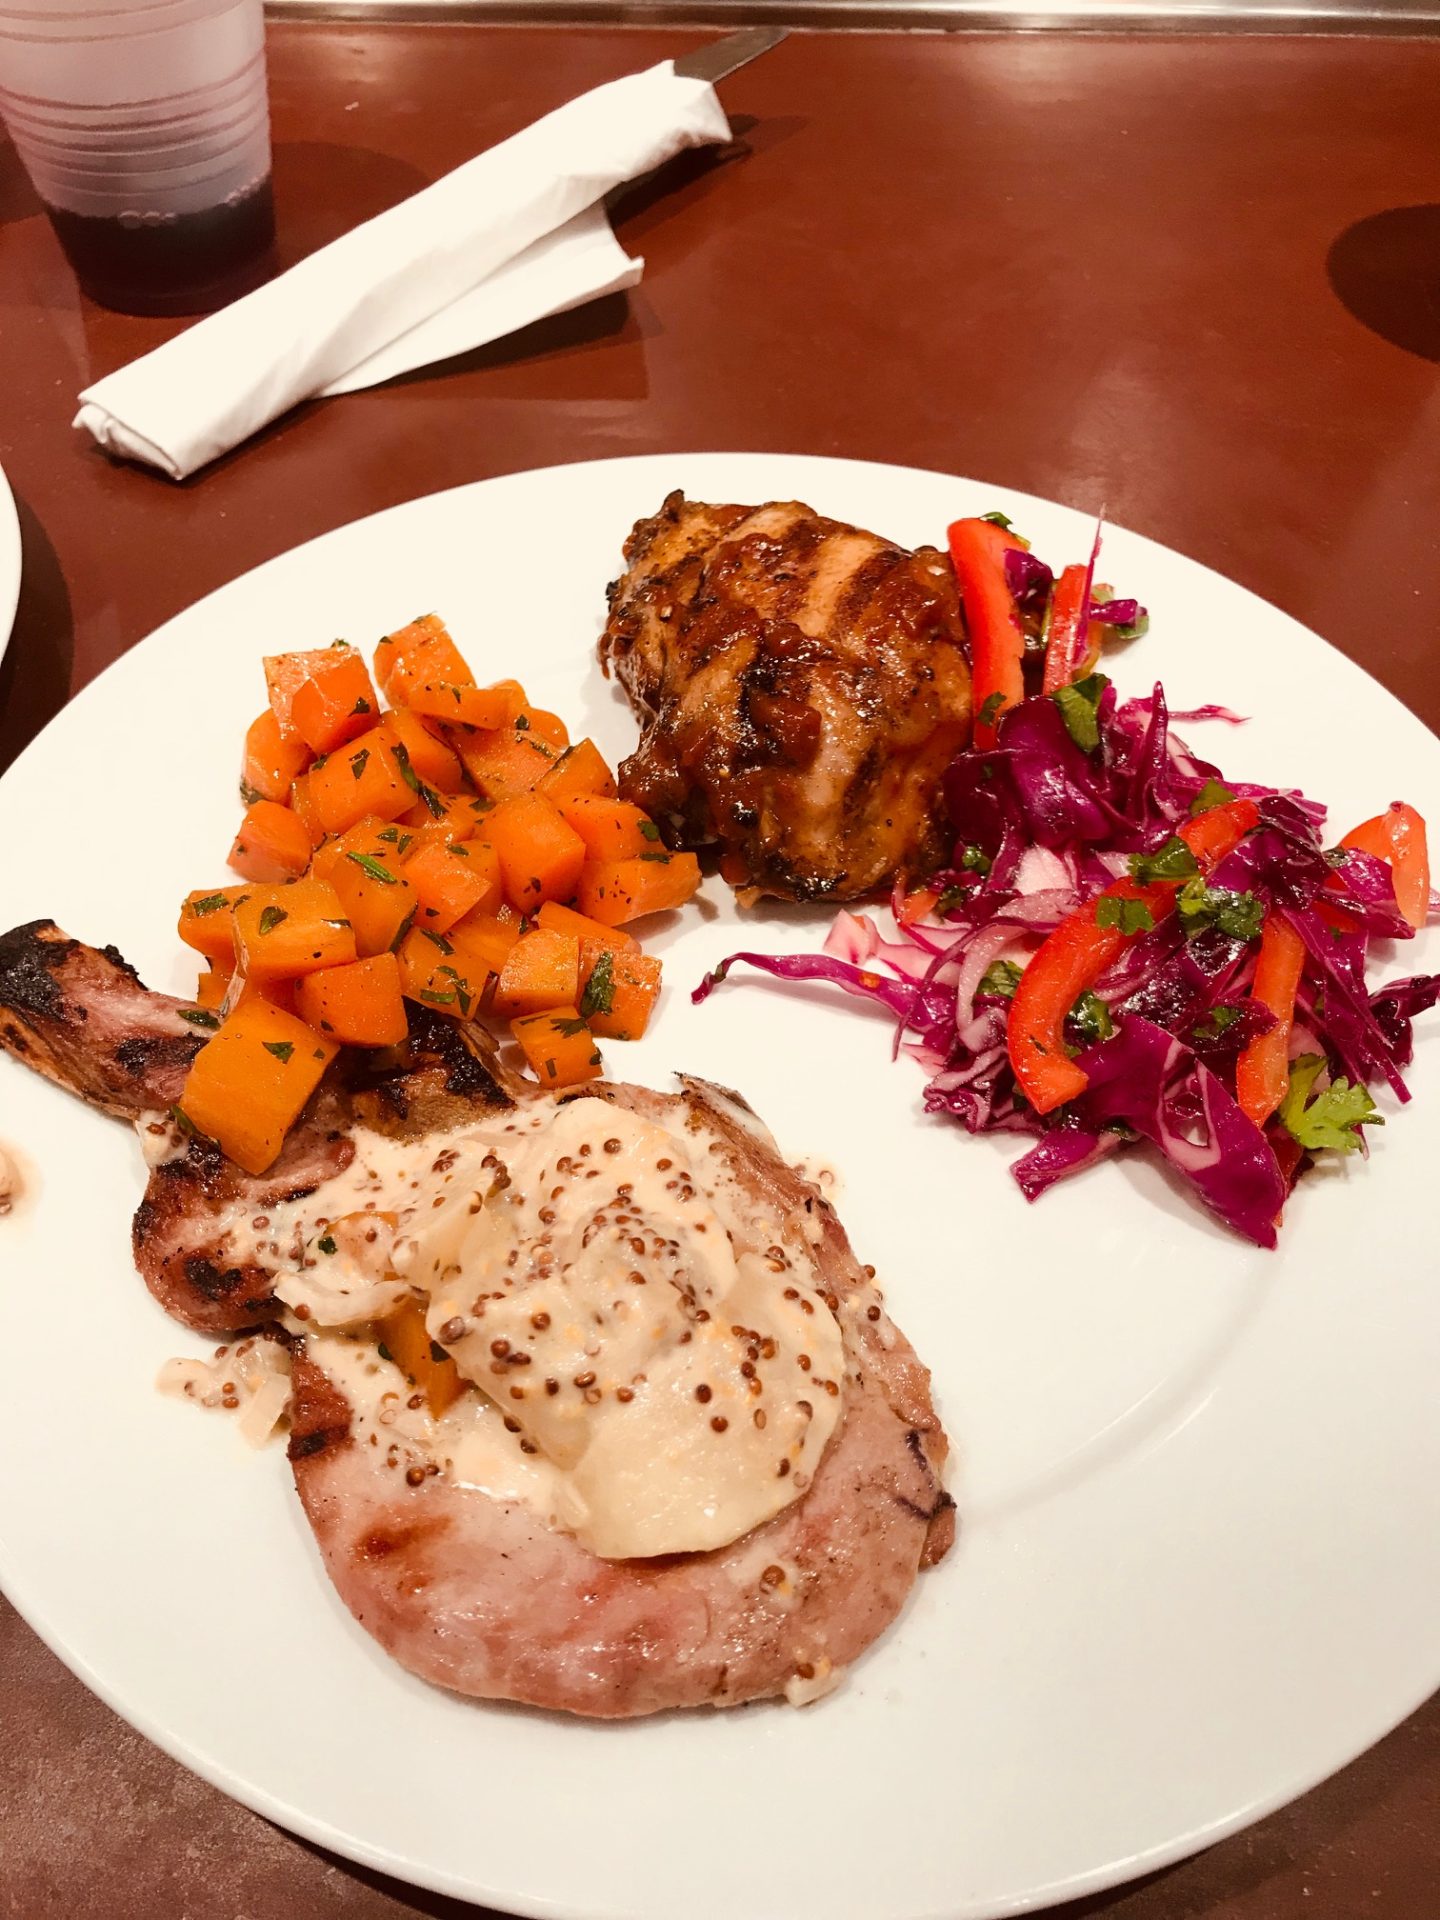
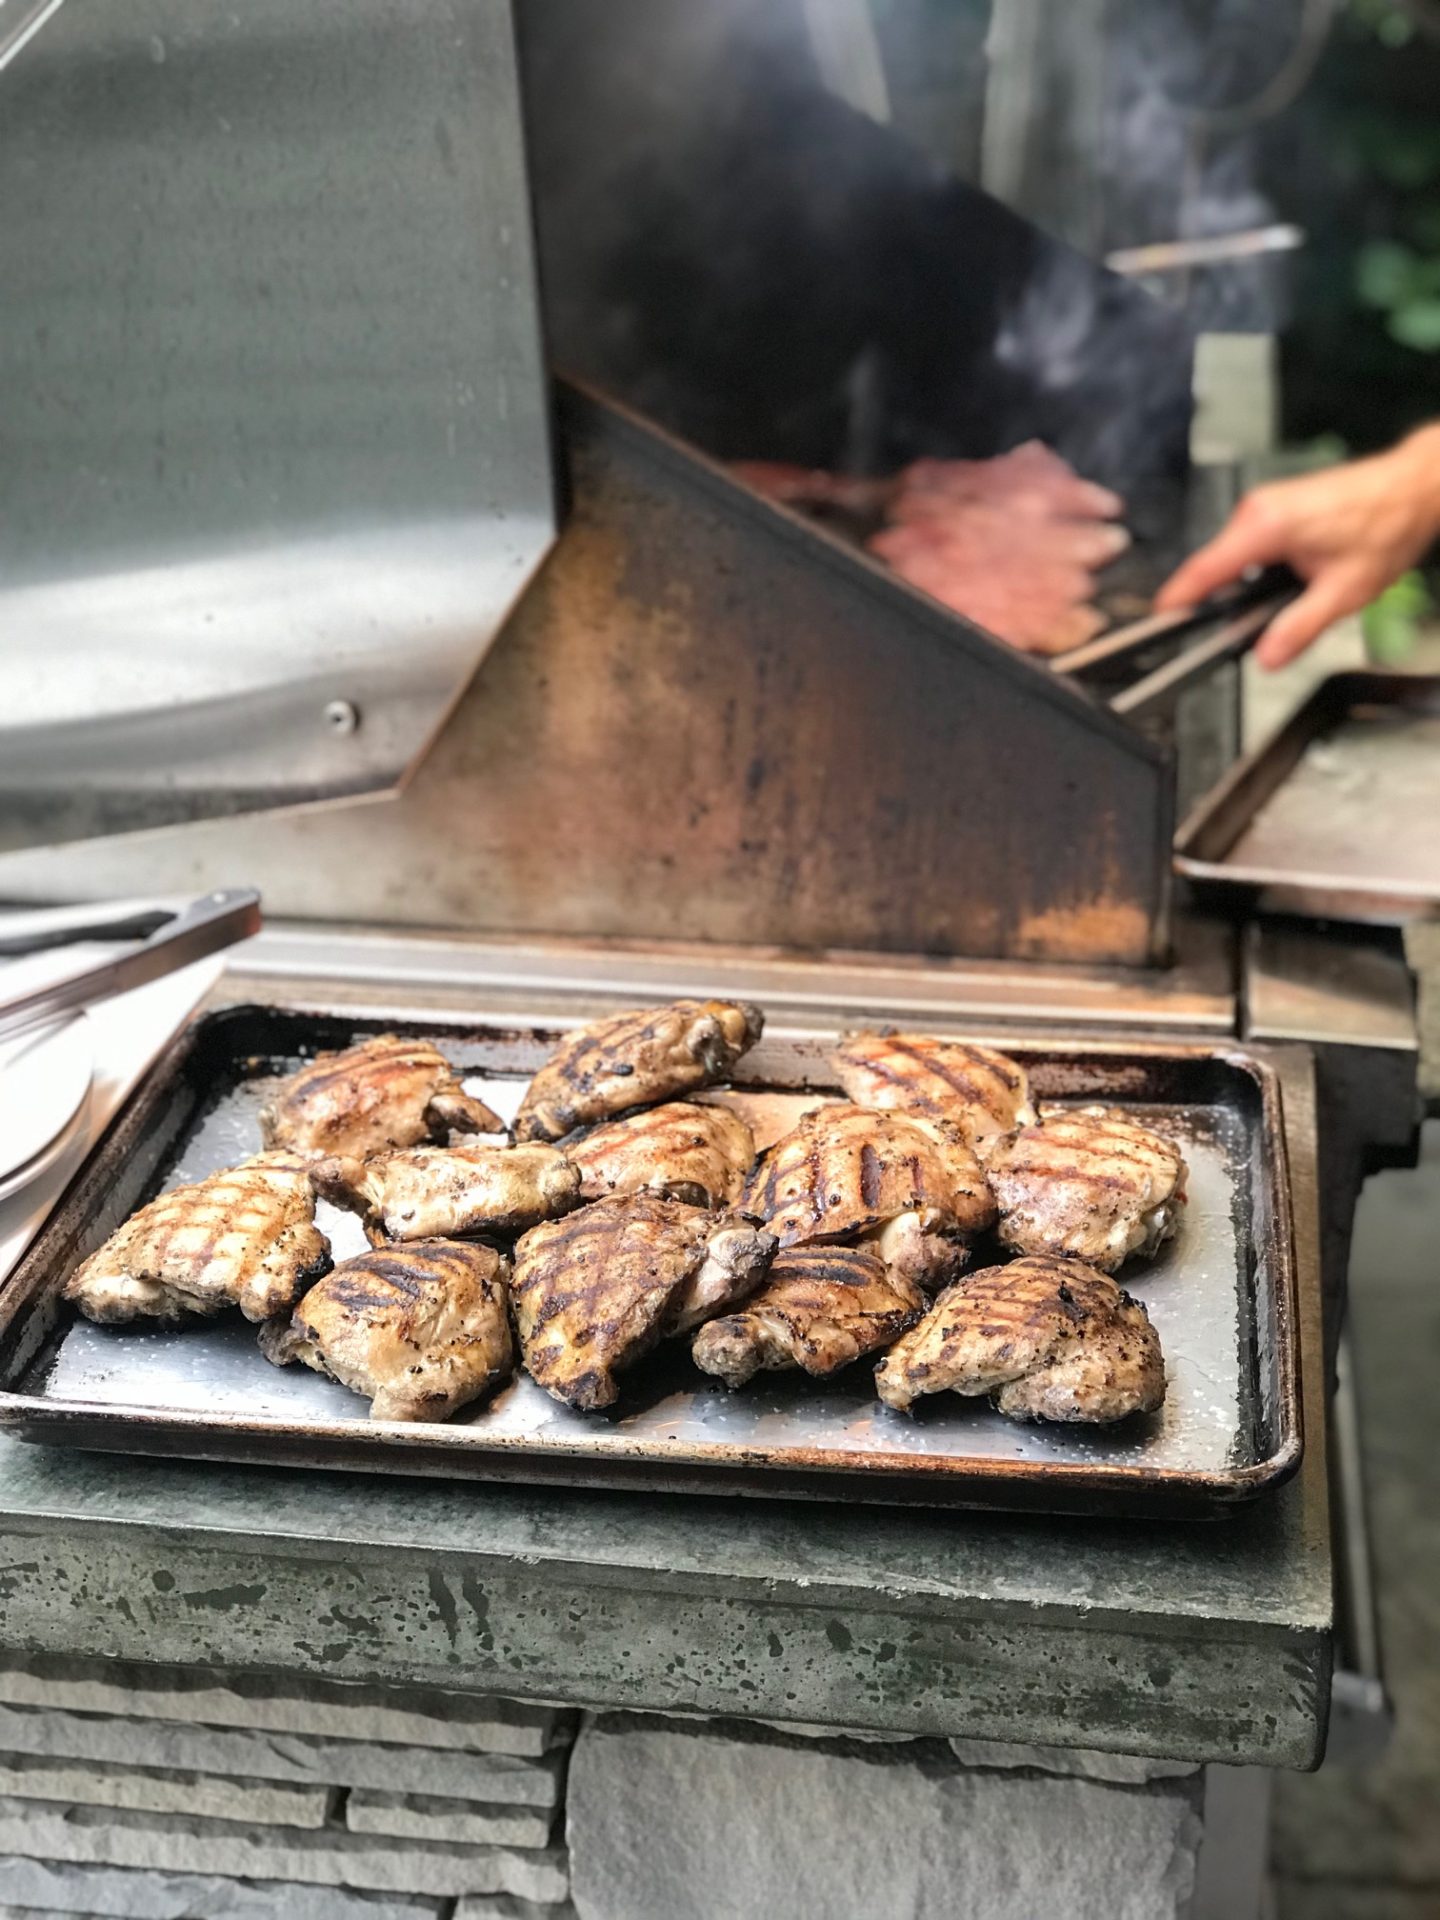
Next, the couples split up cooking the main dishes and sides. This included Grilled Chicken with a Whiskey BBQ sauce and spicy slaw, Grilled Whiskey Mustard Pork Chops with grilled apples, and Whiskey Glazed Carrots (this was my”holy crap” moment – we’re talking carrots glazed in butter, brown sugar, and whiskey, people). While it’s easy to say that any of this was the ‘best of’ chicken, pork, vegetables, etc. we’ve ever had – let’s talk dessert…

GUYS.


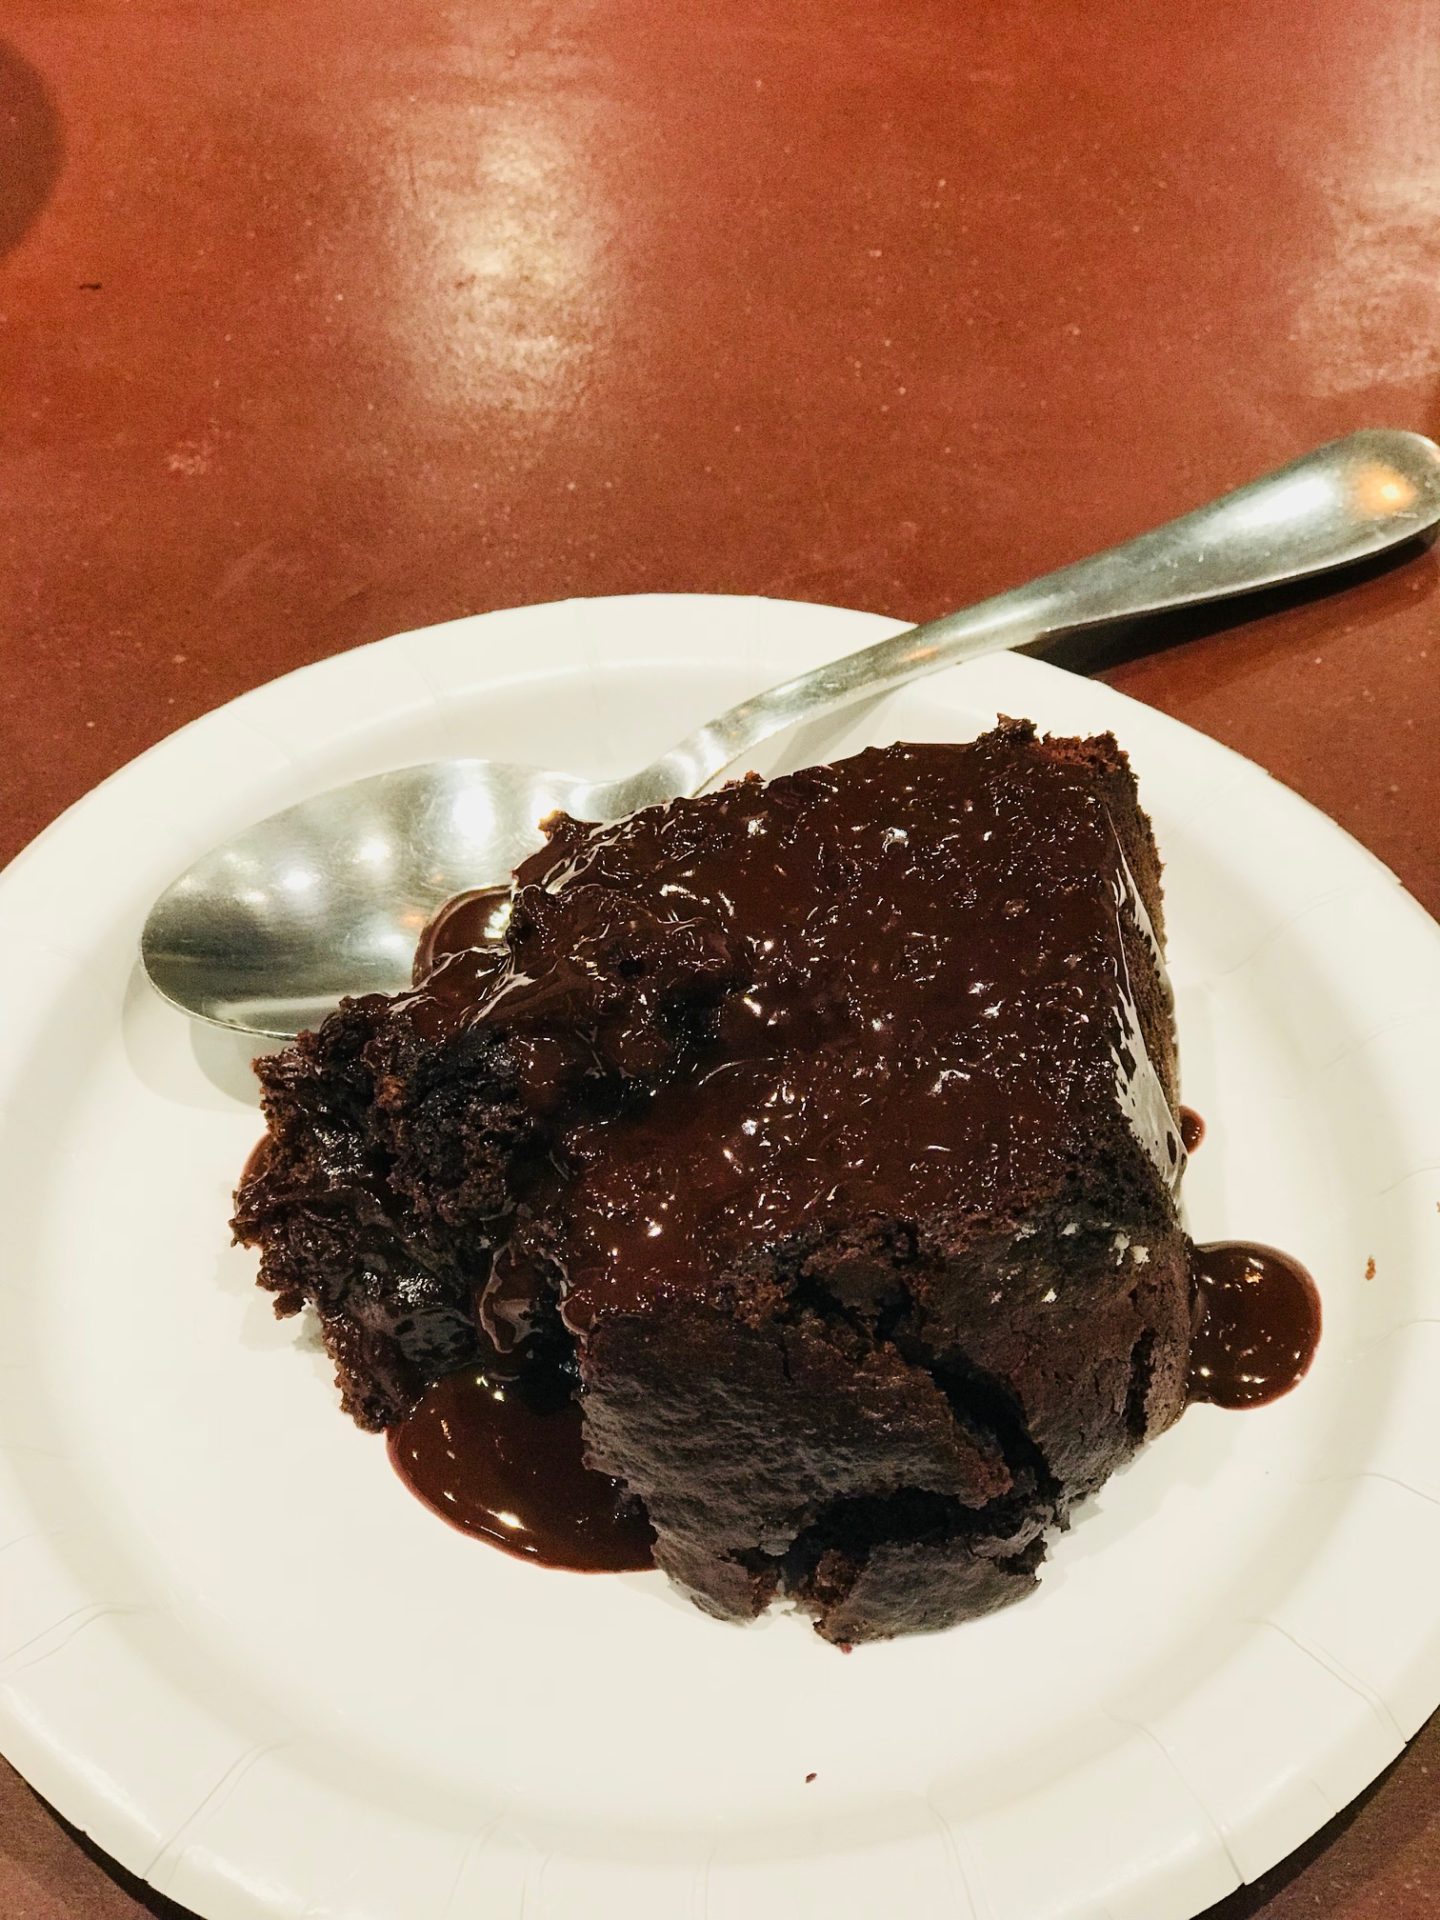
I kid you not- there was complete silence once the Double Chocolate Whiskey Cake with Whiskey Chocolate Ganache was served and everyone took their first bites. We’re talking out-of-body-experience kind of cake. It was the perfect amount of moist (I hate that word) cake mixed with a warm, oozing, ganache at the center of it all. One of the other ladies in our group caught eyes with me from across the seating area, shook her head, and threw up her arms in praise. We were each able to have a gigantic slice and I borderline licked the plate. 

Bryan’s reaction: “I never want another kind of cake for my birthday ever again”. 

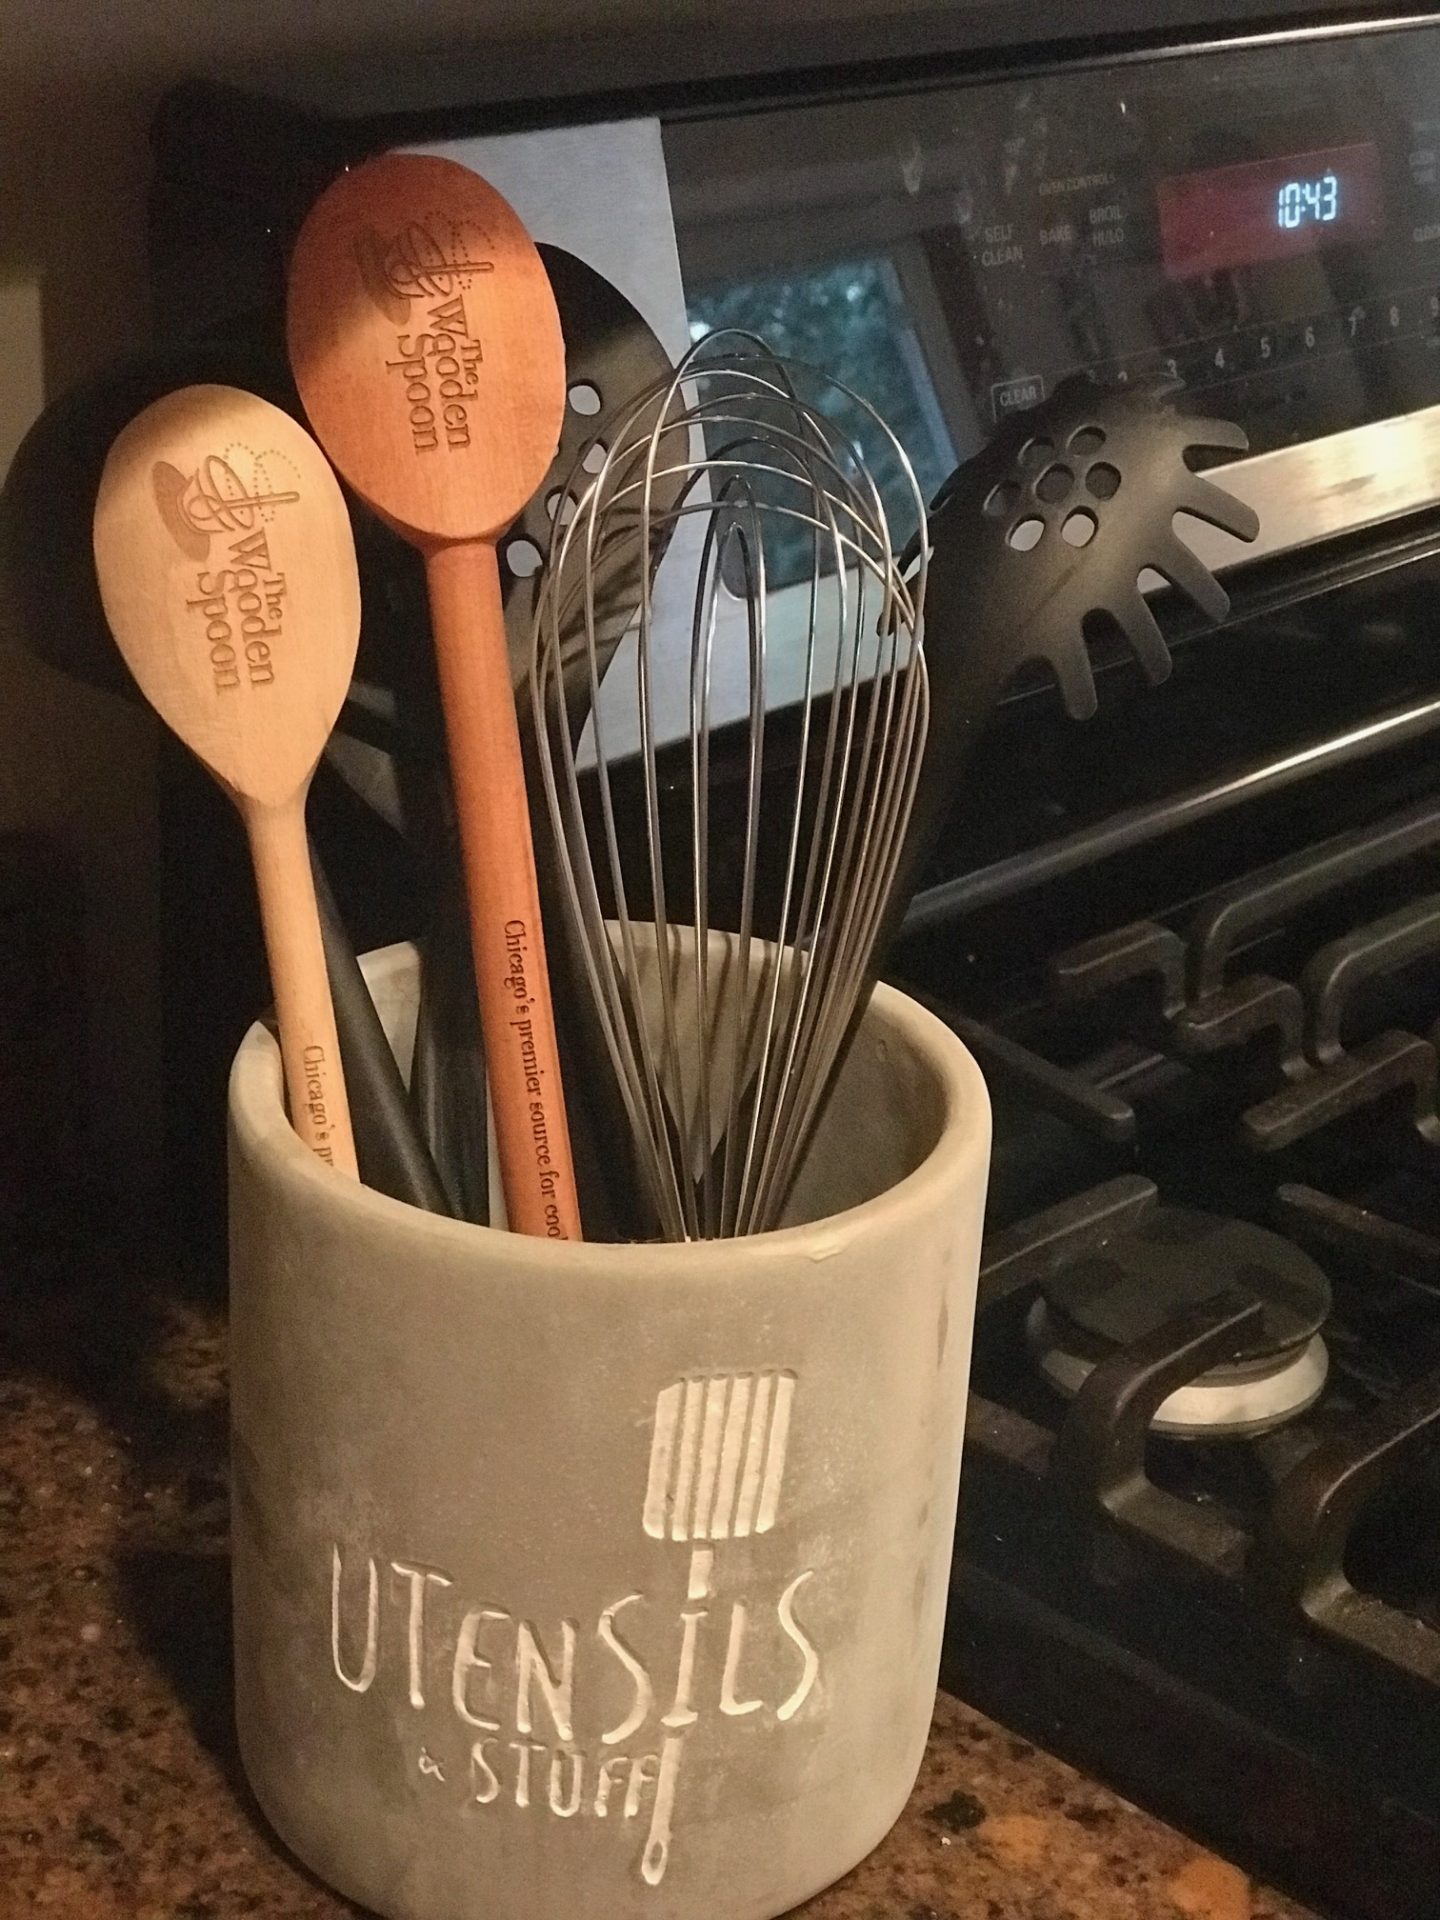
We ended the evening with applause for ourselves and Chef Richard, took pictures with our newly made cooking friends, and perused the shop for some must-have kitchen items. Bryan and I picked up a cute cast iron cook book, new meat thermometer, and of course- a couple of adorable wooden spoons with their logo to remember the evening by.


To say that we left with our bellies full is the understatement of the year. I loved that Bryan and I got to share this experience together and we will 100% be going back for future classes. The recipes from the evening were shared with us via e-mail minutes after we left the class and I know these dishes will be on rotation in our own kitchen here at home. I more than recommend The Wooden Spoon for your own date night or a fun evening out with a group of friends. Thank you to everyone at The Wooden Spoon for making our anniversary celebration such a special one!


Link here to the calendar of classes to book your own experience at The Wooden Spoon!


Dark & White Chocolate Almond Butter Cups

I can’t say that I am sorry for another post involving some sort of nut butter and chocolate. Though, a recent craving has evolved in to a treat I’ve already made a handful of times and I thought it worth sharing. More times than not, my nightly dessert doesn’t need to be more than a small square of chocolate or candy. As a result, I have recently been very fond of the Justin’s Peanut Butter cups that come in two packs because Bryan and I can easily split one at night after dinner. Because my trips Whole Foods to purchase these have increased exponentially, I got to thinking that I could easily make my own version of these delicious treats – and even customize them based on what kind of chocolate or add-ins I have a taste for (ie; various kinds of nut butters, chocolates, dried fruits, nuts, cacoa nibs, seeds, sprinkles, etc). The bonus here is that the chia/flax combo with the nut butter makes these pretty filling so having one of these as a treat after a workout would be great pick-me-up. I whipped up a small batch of these for my mom as she’s recently gotten her taste for sweets back while in the hospital and they couldn’t have gone over better. In fact, a couple of her nurses have already requested some.

This is a perfect sugary snack to share at a get together or keep a container tucked in your fridge or freezer for your nightly sweet tooth. 

I highly recommend investing in a silicone mold for making anything involving chocolate. I purchased this one a while ago from Wilton and I have used it for everything from candy molds to mini-brownie bites. If you do not have a mold, a mini-muffin tin and papers will work fine too!

Almond Butter Cups

  • 1/2 cup any nut butter of your choosing (My favorite is Justin’s Vanilla Almond Butter)
  • 2 tbs coconut oil
  • 1 12 oz bag of white chocolate chips or candy melts
  • 1 12 oz bag of dark chocolate chips or candy melts (or milk chocolate, if you prefer)
  • 2 tbs coconut sugar
  • 2 tbs chia and flax seed blend
  • Cooking spray
  • Silicone candy mold or mini muffin tin & mini muffin papers
  • Coarse sea salt


  1. Spray mold with cooking spray or line muffin tin with papers
  2. In a microwave safe bowl, combine white chocolate and 1 tsb of the coconut oil. In a second microwave safe bowl, combine dark chocolate and 1 tbs of the coconut oil. Microwave each bowl separately at 30 second intervals and stir between each interval until full melted. 
  3. Fill each mold 1/3 of the way with the melted chocolates and place mold in freezer for 10 minutes.
  4. While mold is in freezer, combine almond butter, chia/flax blend, and coconut sugar and place in the refrigerator.
  5. Take mold out of the freezer and place 1 tsp of almond butter mixture in the center of each cup and flatten gently with a spoon. 
  6. Fill each mold with the remainder of the chocolates and place in freezer for 3-5 minutes, or until chocolate JUST begins to harden. 
  7. Top each mold/candy with a pinch of coarse sea salt and place in freezer for 5 more minutes or until fully hardened. 
  8. Pop each candy out and enjoy! (Note, store almond butter cups in refrigerator)


Overnight Oats

It’s Sunday which means extra couch time, catching up on some a lot of laundry, and planning our meals for the week. Am I the only one that enjoys spending the morning with a cup of coffee, a couple of cookbooks, Pinterest recipes, and my grocery list? Admittedly, I enjoy our weekly Mariano’s trip gathering everything we need for the week – though it might be because I start the each trip with a visit to the smoothie bar. 

I’ve noticed I spend most of my coffee/grocery list time thinking of easy to grab, WW Point-friendly, and creative breakfasts to eat during the week. You can only eat so many Cheerios before you start to get a little bored. I wrote about some delicious breakfast sandwiches here but sometimes I find myself craving something a little more sweet than savory. When it comes to sweet breakfast choices that leave you feeling full, overnight oats are at the top of the list. I have no idea why it took me so long to make these a staple in my house, considering that there are a million different ways to cater them to your taste. 

My new favorite OO’s recipe comes from Ashlyn from ‘A Dancer’s Plate’. Her recipe for Chunky Monkey Overnight Oats tastes like a healthier but just as tasty version of the famous Ben and Jerry’s flavor. The only way I can describe these oats and give them justice is a cross between ice cream and a parfait. The banana + peanut butter + coconut + chocolate combo is like eating dessert for breakfast with zero guilt. I swear I had these every morning for a week straight. You can find this very simple recipe and find more of Ashlyn’s delicious ideas here.

The best thing about Overnight Oats is how little preparation – if any – they take. Mix up a few ingredients, pop your container in the fridge, and add whatever flavors/toppings/proteins you’re feeling the next morning. This is what makes them so simple to customize. Ashlyn’s idea for Chunky Monkey OO’s gave me the idea to start playing around with other flavors that I like. A few ingredients I had on hand gave me the idea to replicate my favorite dessert – chocolate covered strawberries. 


After a little unsweetened cocoa powder, some Justin’s Chocolate Hazelnut Butter, and a few dark chocolate chips, these OO’s were absolutely decadent. Top with some strawberries and they are ready to go. I always make sure to pack OO’s in a small mason jar or plastic container so I can throw in my bag and take to the office. You can find my recipe for the Chocolate Covered Strawberry OO’s below, but it’s so simple to experiment with your favorite flavors. All you need is your oats and dairy or non-dairy milk base to sit overnight. If you decide to add anything in powder form (cocoa, protein, collagen, etc.), flax, or seeds mix those in the night before as well. Yogurt, butter/nut spreads, fruits, and toppings can be mixed in the next morning. 

What other flavors do you enjoy?

Chocolate Covered Strawberry Overnight Oats

*Yields 2 servings – 9 WW Smart Points per Serving

1 cup quick oats

1 cup unsweetened almond milk

2 tbs unsweetened cocoa powder

1/2 cup vanilla greek yogurt

2 tbs Justin’s Chocolate Hazelnut Butter

1 packet Stevia

2 tbs dark chocolate chips

1/2 cup sliced strawberries


-Combine oats, almond milk, and cocoa powder in a small container. Refrigerate overnight.

-Mix in greek yogurt, chocolate hazelnut butter, and Stevia in the morning.

-Top with chocolate chips and strawberries. Enjoy!


Peanut Butter Blossoms

 img_3455 

Have you ever had one of those days where you have a sudden craving for something you haven’t had in quite some time? Friday was one of those days. Lately, my team at the office has been experimenting with strange/weird combinations of cookies and treats (Candy Corn and Peanuts…Red Velvet Oreos… Butterscotch M&Ms…) which means there has been a lot of sugar hanging around our cubicles. All of this cookie talk on Friday left me thinking more about baking my own treats and less about actual work as it got closer and closer to 5 o’Clock. 

I was looking for something to bake that didn’t take much time and I that I already had most of the ingredients for in my baking cabinet. I developed a sudden taste for something peanut butter related and naturally the first thing that came to mind was Peanut Butter Blossoms. It’s a timeless cookie and would definitely satisfy my sweet tooth. 

In the spirit of taking some of the guilt out of these cookies, I decided not to use any flour. I have seen numerous recipes that completely eliminated the flour out of these cookies and that still looked delicious. In addition to this, I decided to add a ground flax/chia seed blend to the dough-an ingredient I have recently become obsessed with adding to a lot of my baked goods. This blend packs a lot of protein (even more than nuts) and also delivers a dose of heart healthy Omega 3’s.  Hodgson Mill Brand makes a relatively inexpensive blend that is easy to incorporate in many recipes. 

This recipe also makes about 4 dozen cookies so it’s a perfect treat to keep on hand for any weekend get-togethers. 🙂 

Peanut Butter Blossoms
Yields 4
A classic cookie packed with lots of protein.
Write a review
Print
Prep Time
10 min
Cook Time
8 min
Prep Time
10 min
Cook Time
8 min
Ingredients
  1. 2 Cups Organic Light Brown Sugar
  2. 2 Cups (1 Jar) Smuckers Natural Creamy Peanut Butter
  3. 1/2 Cup Hodgson Mill Ground Flax/Chia Seed Blend
  4. 2 Eggs
  5. 2 tsp Vanilla Extract
  6. 48 Hershey's Kisses
Instructions
  1. 1. Preheat oven to 350 Degrees.
  2. 2. Mix Peanut Butter, Flax/Chia Seed Blend, Brown Sugar, Eggs, and Vanilla until ingredients become dough-like.
  3. 3. Use a regular sized cookie scoop (or roll tablespoon balls) and place on a lightly greased cookie sheet (I used coconut oil cooking spray).
  4. 4. Using a metal spoon, very lightly pat down tops of balls of dough to flatten just a little bit.
  5. 5. Bake for 8 minutes
  6. 6. Immediately after baking, gently push one Hershey's Kiss in to the center of each cookie.
  7. 7. Let cookies fully cool before serving
Sweet T and a Honey B https://www.sweettandahoneyb.com/